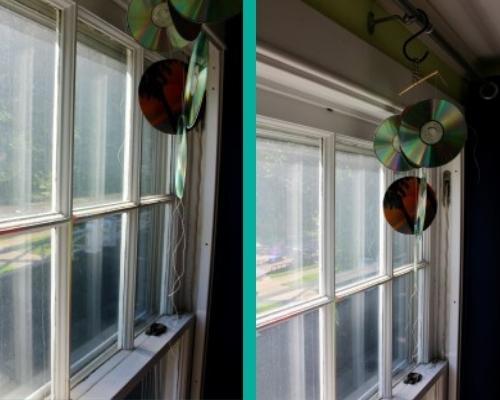
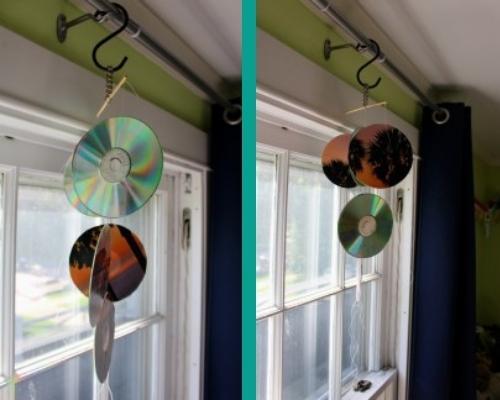
Hello everyone – Happy almost summer! Abby back with another upcycle project for you all!
We LOVE a zero-waste craft in this house, and today’s fits right there! The inspiration for today’s DIY was incredibly random, but am sharing because it illustrates how easy it is to find inspiration anywhere. A few weekends ago, we were driving back from a beach day at Lake Erie, and I noticed little rainbows all over the car. They brought me so much joy, and upon realizing they were simply from the sun reflecting off of some CDs I had out, I decided to replicate for indoor, everyday use.
I’m not sure about you all, but I used to love burning CDs. Mixes were the best, but sometimes I’d copy CDs I owned so I had an extra copy for the car, or wherever else. Fast forward a long time later, and I have a bunch of CDs I don’t listen to anymore. What to do with all of these CDs? Today’s DIY! (If you don’t have CDs lying around, I’m sure you can find some at your local Goodwill 🙂 )
Unlike last month’s project, I just went for it with this project. I didn’t overthink anything at all, and because of that, it took about 20 minutes (including glue dry times). Read on for how to make your own indoor rainbows!
To make your own indoor rainbows, you will need:
1. CDs OR something reflective that bounces light around to create rainbows
2. Scrap paper, magazine cutouts, old images from calendars, etc.
3. Glue – I used Elmer’s Glue and Craft Spray Adhesive
4. String
5. Something to hang your Rainbow-maker from – I used a chopstick and some spare chain, but you could use more string, a hanger, a paperclip – get creative!
6. Marker, Scissors

This project doesn’t really have set steps, per se, but this is the order I did this project in:
First, I picked my CDs. I picked ones that made the best rainbows when reflecting the light. Then, I laid them out in the pattern/arrangement I wanted.

This next step could be first, but I did it second. I picked out some imagery I wanted to live on the other side (the non-reflection side/the side the CD writing is on) of the CDs. I went with a “tropical sunset” theme because I had the least amount of these images, so felt like that made this an easy decision. I traced 6 circles with the CDs on the images I wanted.

Next, I turned the CDs over to show the writing side (don’t judge my CD collection). I laid some string over the CDs where I wanted it to land/lay and then collect for the hanging part at the top.

I used Elmer’s glue to glue down the string to the CDs.

Once I had glued string to hold all of my CDs together, I used spray adhesive to adhere my cut circle images to the writing side of the CD. This will give a rainbow side of the CD, and then a pretty picture side of the CD when it hangs.


After EVERYTHING dried, I tied my strings to a chopstick – I had three at the top of my creation. Once I had my string tied to my chopstick, I put a bit of Elmer’s glue on the knots to keep them in place and add a bit of extra support.


I didn’t really capture this part very well, but once my knots had dried, I attached a bit of spare chain to the chopstick between the knots to hang. I hung my creation on an S-Hook in my oldest son’s room to catch the light (his room has the best light in the afternoon, but TBD on where this will live permanently).

I left the strings long, since I might want to add some beads or something extra to this piece at a later date. You can easily cut them as short as you want, assuming you don’t want them for hanging purposes.

The rainbows are super subtle, so will play around with different placements in the house to see if I can catch some bigger ones. But also know I’ll experiment with additional versions of this project, as well. I’m thinking one that is just a long line of CDs in a single line.
What do you think? Do you have ideas on how to make more indoor rainbows? Is this something you think you’ll try out? If you make your own Indoor Rainbow maker, we’d love to see them! Share with us on social, @goodwillakron or @_abigaildrennen!
Happy zero-waste crafting!
_Abby

