
Hello everyone! Abby here – How’s your summer kicking off? Less cook outs and get-togethers for us, but continuing the theme from last month of working outside and getting our yard cleaned up for the kiddos – We’re close, but those weeds keeping coming back!
When I want a break from outdoor work (or it’s “500 degrees”, like my toddler likes to say), you know I love a good craft project, and today’s is a doozy! If you are looking for a longer, sort of tedious, best done in a few 1 hour increments, zoning out to a podcast/music/your latest streaming TV show binge (that you don’t really have to pay attention to), then today’s project is for you.
Today’s project is one I’ve been meaning to make for YEARS, but never got around to because I was a bit intimidated, and with good reason. Like I mentioned, this one is a little tougher than what I normally share, but by tougher I mean, I’m used to instant gratification craft projects, and this was more a slow burn. BUT without further adieu, today, I am sharing how to make a secret book stash!
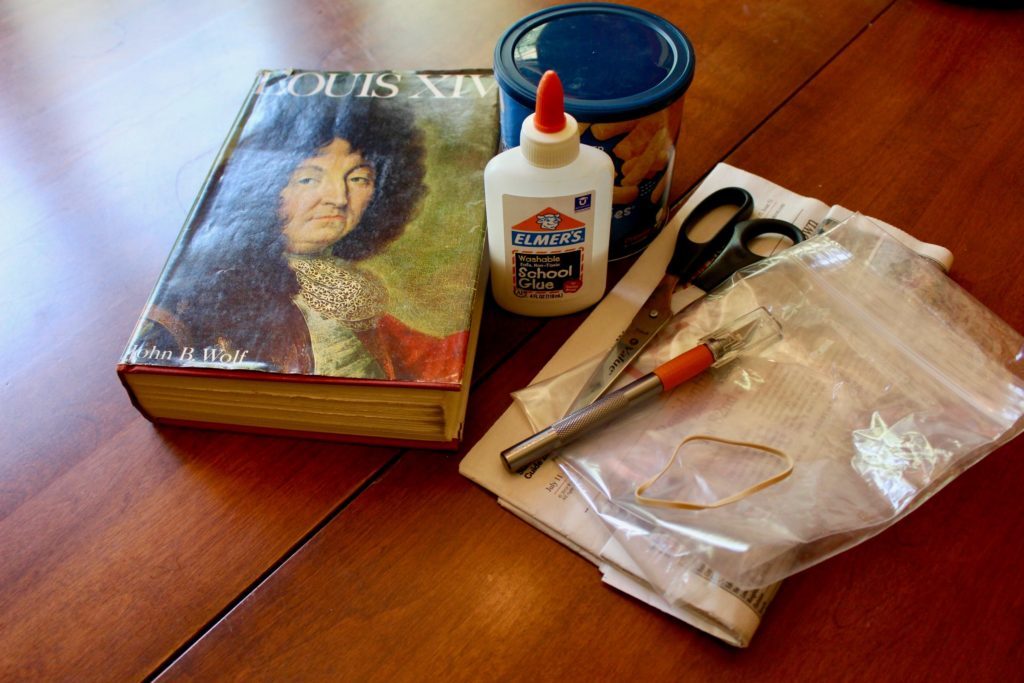
I love this craft because it combines two of my favorite things: secret hiding spots and books (plus mindless work you can zone out and do, but we’ll get to that part). Goodwill gets a ton of books donated, so be sure to check out your local store for a gem. Otherwise, something you have on your shelves, or maybe were going to donate, will work great, too! I am a big fan of French history, so had picked up this Louis XIV book from our local library’s “free” shelf years ago. Still haven’t read it, so thought it would be perfect for this craft. If I really want to learn even more about Louis XIV, I can look it up on the internet 🙂
To make your own secret book stash, you will need:
- A Book – three inches thick is pretty good
- An X-acto/craft knife (the sharp side of scissors work fine, too, but I think a box cutter would be best, although, sharp knives, caution, etc)
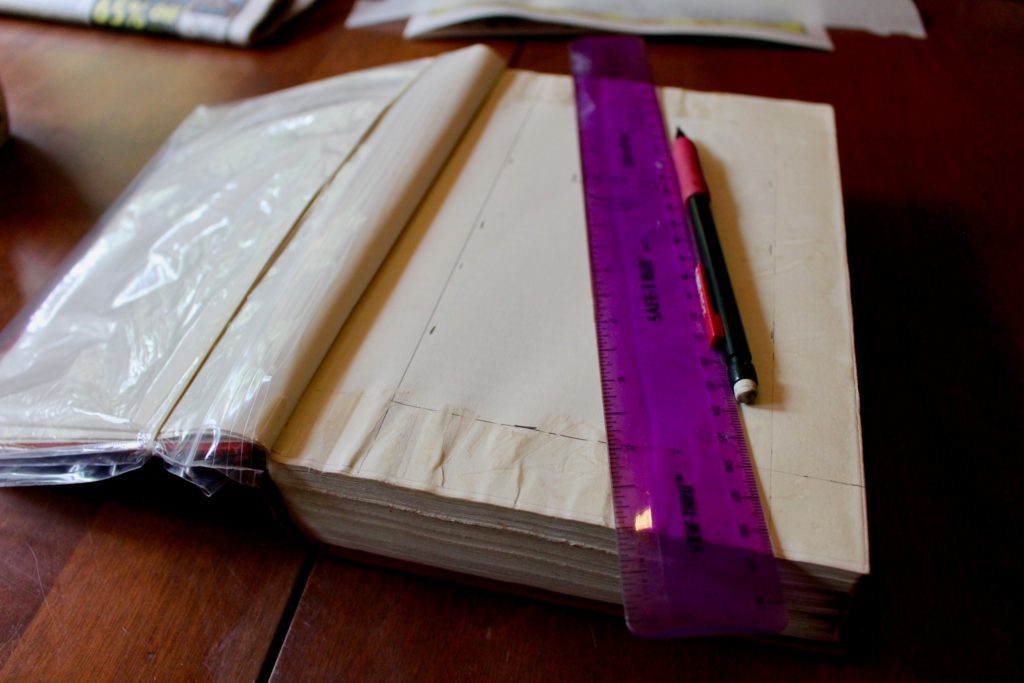
- Ruler
- Pencil
- Glue (not a glue stick) (+water for mixing)
- Paintbrush
- A sealable container – I used an old Baby Cheetos container, but Tupperware works
- Parchment paper
- Plastic Wrap (I used a plastic bag and a rubber band, because, gasp, we didn’t have any plastic wrap around)
- SOMETHING TO HIDE!
I used this tutorial as a guide, but feel free to tweak as you like. You’ll first want to decide how many pages you are going to keep – I kept the foreword, table of contents and some other intro pages. Looking back, I kind of wish I’d kept this “Louis XIV” page, but live and learn. Once you’ve decided what you are keeping, wrap that up in your plastic wrap (or plastic bag in my case). This will keep these pages safe from the massive amounts of glue that will be applied coming up. NOTE: If you have a dust jacket for your book that you want to keep and put back on your book when you are all finished making your secret book stash, remove it, but also save the back cover and any additional pages and wrap in plastic wrap, so they don’t get glued down.


Next, you’ll want to mix equal parts glue and water and apply excessively to the sides of your book, sticking all of the pages together. I used about two tablespoons of glue and two tablespoons of water (didn’t use measuring spoons, just eyeballed it).
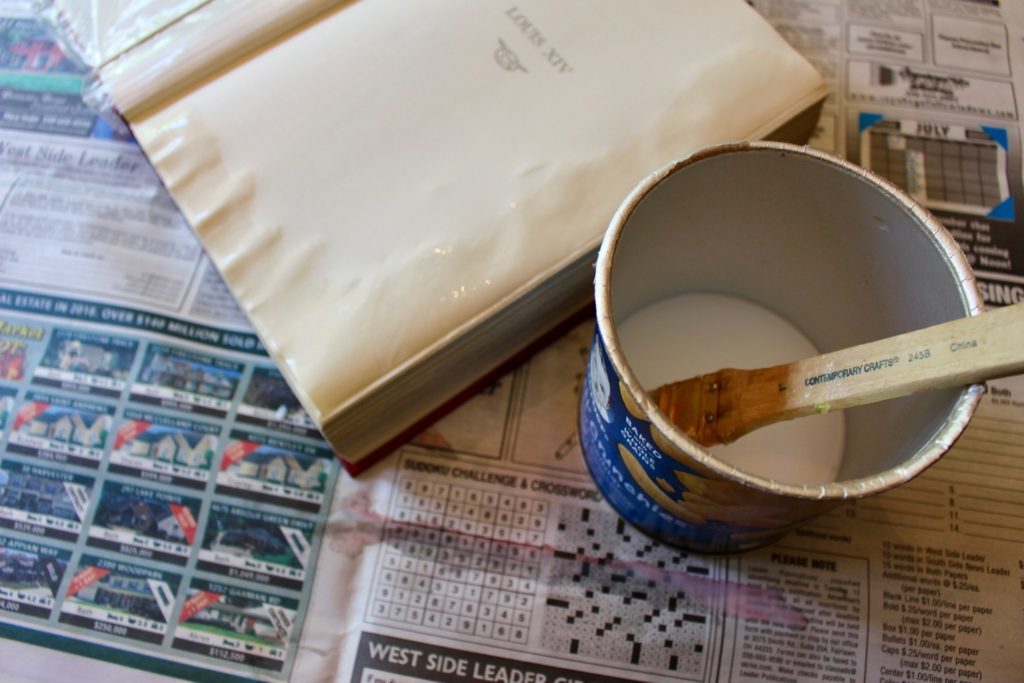
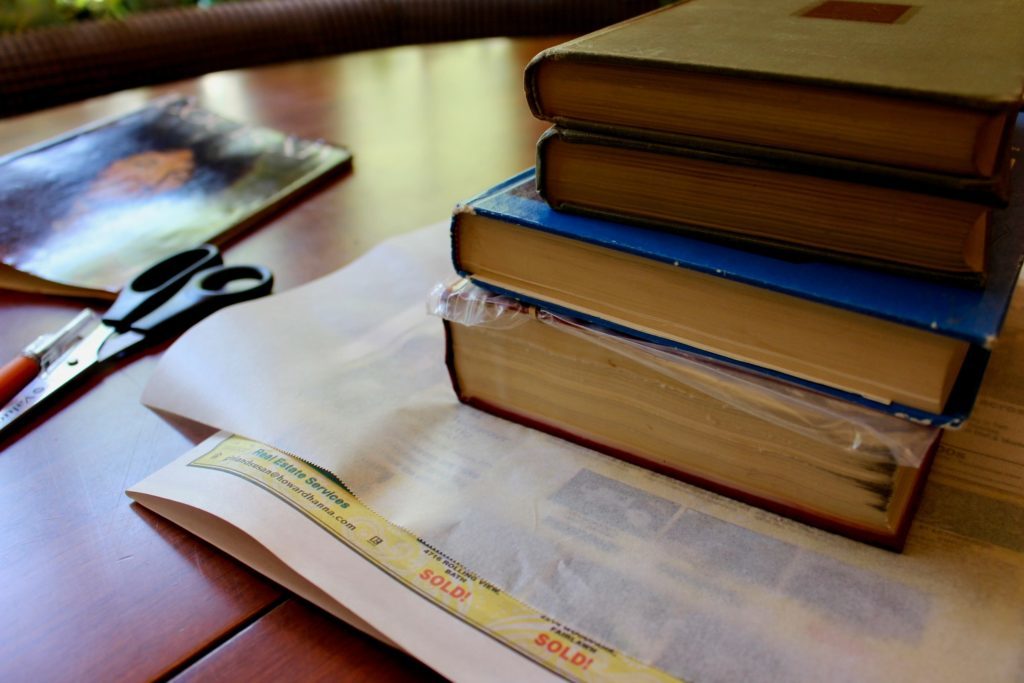
Once you think you’ve applied enough glue, apply some more. Then, close your book and stack some other books on top to weigh the pages down and really stick them together. Let this sit overnight, or at least a few hours.
After your glued together pages have fully dried, measure a box/rectangle in your book, marking 1 inch from each side.
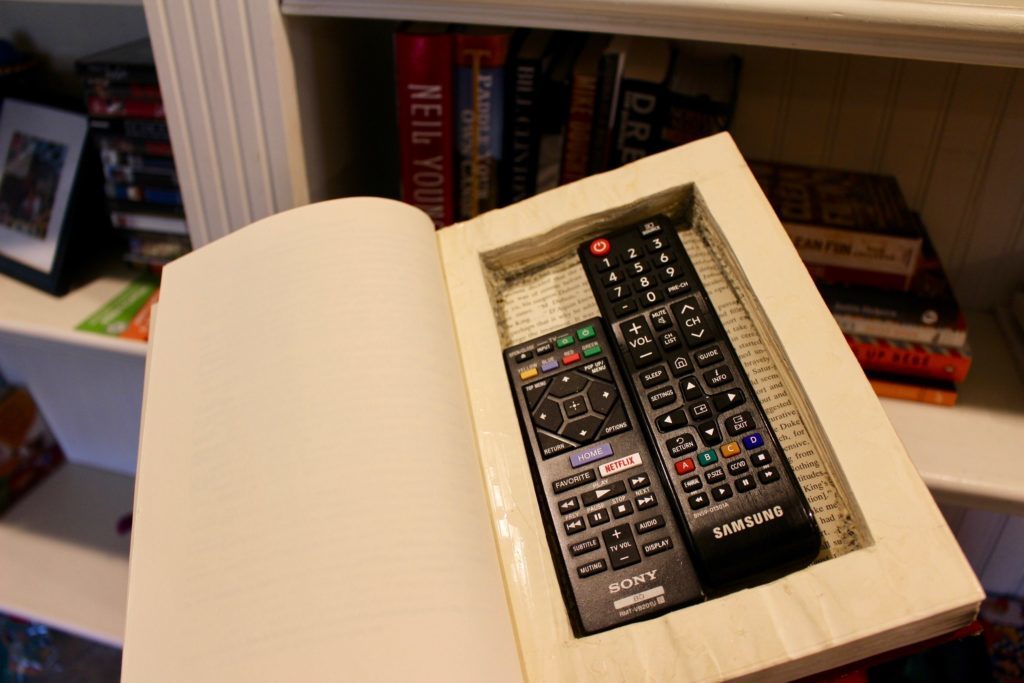
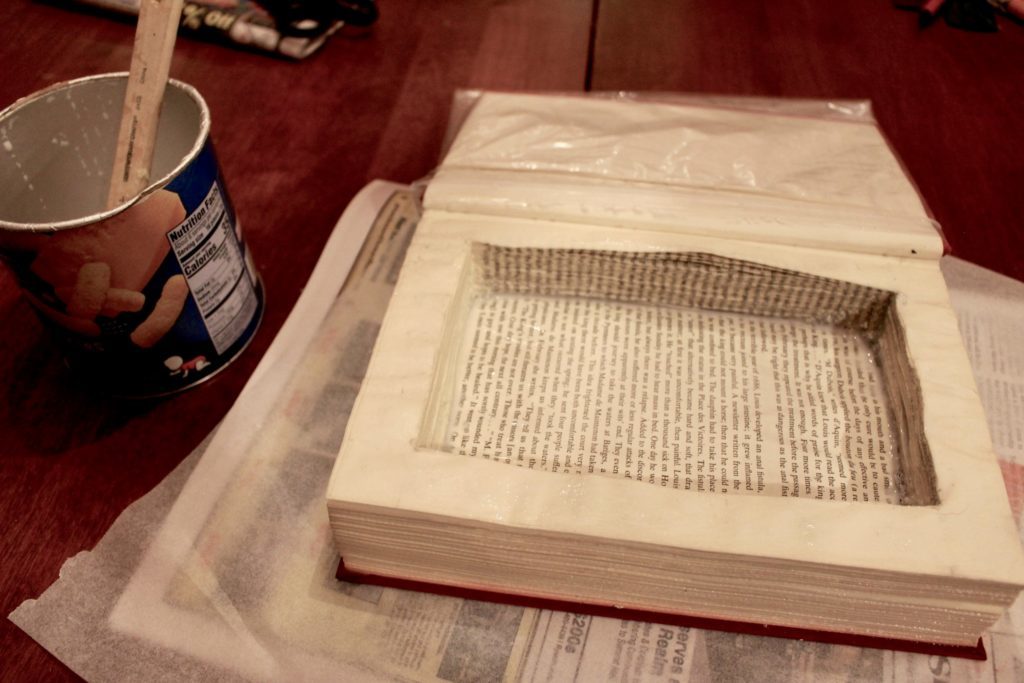
I made sure to double check that my remotes would fit in this box. This step is totally optional. Then, you’ll get to cutting. Using your X-acto, craft knife, box cutter or scissors, cut along the line you marked, cutting through pages. This is the tedious part. The corners, especially. The tip of my X-acto knife broke off about halfway through, so go easy, take your time, and make sure to cut away from yourself.


Keep cutting, until you have about an inch of full pages left OR you have cut deep enough to fully hide your secret items. Once you’ve finished cutting out all of the pages you want, brush your leftover glue mixture (or make some more), on the inside of the book/sides of your secret compartment. I also had to brush some more glue on the outside of my book, because some of my pages came undone while I was cutting. Re-stack your other books on your secret stash, and let it dry overnight.
Once all of your glue has dried, load up your book with your secret items, and see if anyone finds them! I was thinking about evolving this craft to become a cell phone charging station for our dresser, or even in our kitchen. Somewhere, we can hide away our phones so we don’t get distracted by them. We’ll see.


Can’t wait to see how you all put your own spin on this craft! Please share your adventures with us, @goodwillakron and @bottesdeleanor!
_Abby
P.S. Does anyone know how to take care of a prickly pear cactus? We got the one above from the market a few weeks ago, and the top bit is all new growth! Do we just let it grow? Do we propagate? Any plant lovers out there with tips – send them my way!