Happy summer friends! I continue to hope you all are staying safe and sane. Abby here again with another hopefully fun DIY for you. With all of the extra time at home, I’ve been able to work through my endless list of fun DIY projects, and even more thankful that I get to share them with you all.
A few months ago, I shared one of my most favorite and easiest DIY tricks: The CHOP. Well this month, I’m taking it a bit further with an evolution past the CHOP: turning pants into a skirt! If you haven’t had a chance to venture back out to your favorite Goodwill store (like me), you likely have an extra pair of jeans (or really any pair of trousers) that would work great for this DIY.
I inherited a pair of jeans along the way, either via family or old roommates that I’ve been meaning to do something with, but just never knew what. They are Tommy Hilfiger, but they had a slight imperfection around the shin area. The waist and rise seemed perfect for anything besides jeans (at least on me), so I decided to turn them into a skirt!
This DIY is great because it’s another easy sewing project, but could also be no-sew, if you’d rather use glue or heat and bond tape (I found this one on Amazon). I’d also encourage you to explore different kinds of stitch tutorials online. I’ve included two basic stitches below in the instructions, but I could see a lot of fun different ways to stitch this project.
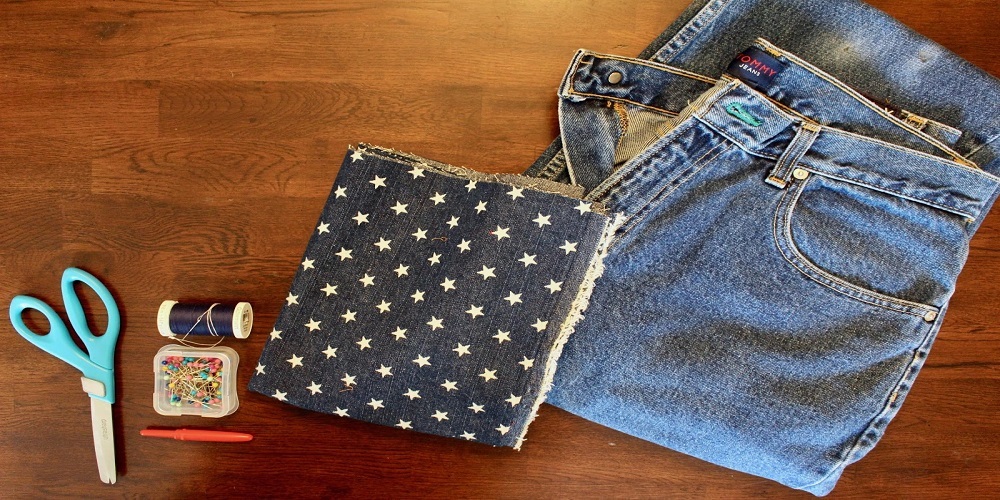
ANYWAY, to make your own skirt out of jeans or trousers, you will need:
- Jeans or trousers
- Scrap fabric (could be a great use for all those mask-making fabric scraps you may have lying around)
- Fabric scissors
- Seam Ripper
- Needle, thread and straight pins OR glue OR heat/bond tape

Just like you did with your CHOP projects, you’ll want to try on your trousers to determine how long you want your future skirt. I decided two inches above knee length is where I wanted mine. I marked it with a straight pin.

Then I CHOPPED!
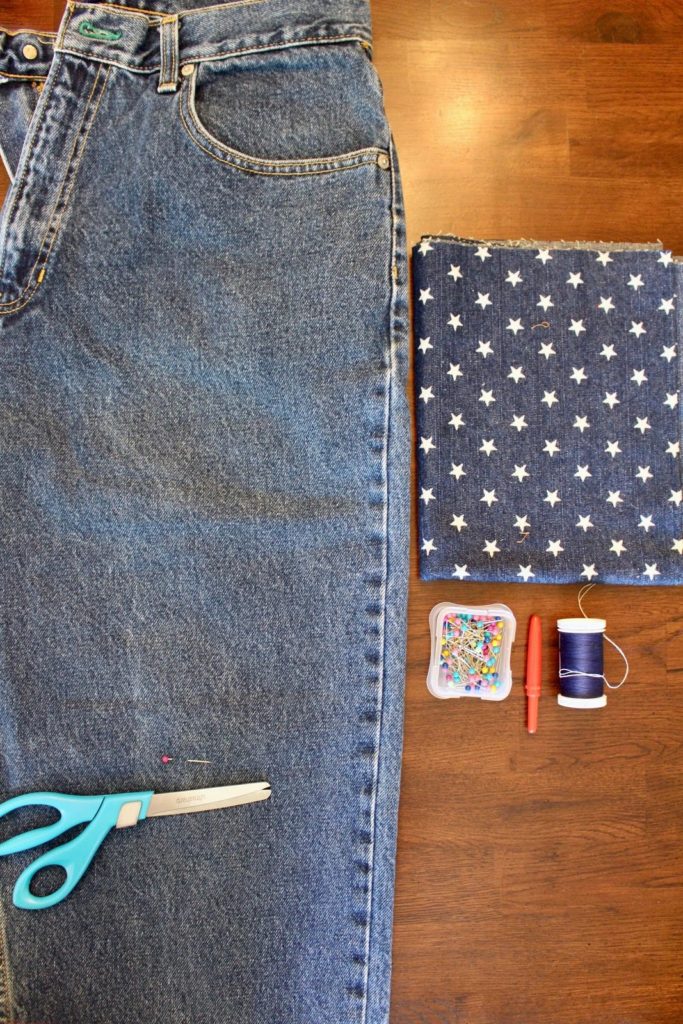
Next, I used my seam ripper to take out the stitching on the inseam of my jeans, all the way to the crotch.


Once I had all of my seams taken out, I re-lined up the seams on the front to overlap to make a skirt. I used my bit of scrap fabric to fill in the gap made between the legs of my jeans. NOTE: If you want the fabric scrap to match your jeans, just use a piece of jean fabric from the bottom part of the jeans that you cut off. Or go crazy with it, and get something real wild! I had some denim star-print fabric lying around for this project.
To line up the two sides of your skirt, you might have to work with the fabric a little. I ironed and re-ironed and pinned and re-pinned the front of my skirt multiple times, and I still don’t love how it turned out. I’ll likely go back and take the seams out all the way up to the fly of these jeans, but we’ll see.


Then you’ll do similar pinning on the back. Again, I might go back and re-sew the back of my skirt, but for now, this does the trick. Depending on your jeans, you may or may not need some scrap fabric for the back. I didn’t need scrap fabric for the back of my skirt. The legs of my jeans overlapped great, so I didn’t need anything extra for the back.


Once your front and back are pinned, you’ll get to sewing. I used a back stitch (quick reference on what a back stitch is here), but you could also use a running stitch (video here) or a blanket stitch (easy tutorial and diagram here) – might I suggest a thread of a different or contrasting color? This link has all sorts of fun stitches to try. BUT if you are pursuing a no-sew version, forget the pins and either glue or tape your overlapping front pieces together (same with your back pieces).
I didn’t photograph this part, but once everything was all sewn up, I trimmed the front of my skirt so there was a straight line.
Then I got to styling!
Outfit 1: Super Casual with a fun detailed T-Shirt, sandals and a backpack.


Outfit 2: A little elevated with a denim blazer, Ruffled Tie-Front Top, Boots and backpack purse.


Outfit 3: Business profesh for those Zoom or Teams calls with a blazer, polka-dot button-down and fun flats.


Before: from unflattering


To After: Fun!


As always, we’d love to see your spin on this craft! Feel free to tag @goodwillakron or @bottesdeleanor if you share on social!
Good luck and happy crafting!
_Abby