Abby here again with another (hopefully) fun DIY for you. Not to sound repetitive, or cliché, but we really have been spending so much more time at our home. With my kiddos the age they are, plus shelter in place, plus working from home, I’ve been really inspired to spruce up the spaces I see all the time: give them a little refresh, move some stuff around, really just make them a place we want to spend time.
As I was scrolling through old pins on my Pinterest board for inspo for this DIY post, I knew I wanted to create something that would bring joy to our home, as well as yours, and that’s when I stumbled on this OLD DIY from the Popsugar archives. Now, I hope by now, you all know I’m all about the improvisation, and that’s what I did with my version of this DIY.
Here’s what you’ll need for your own DIY Starburst Mirror:
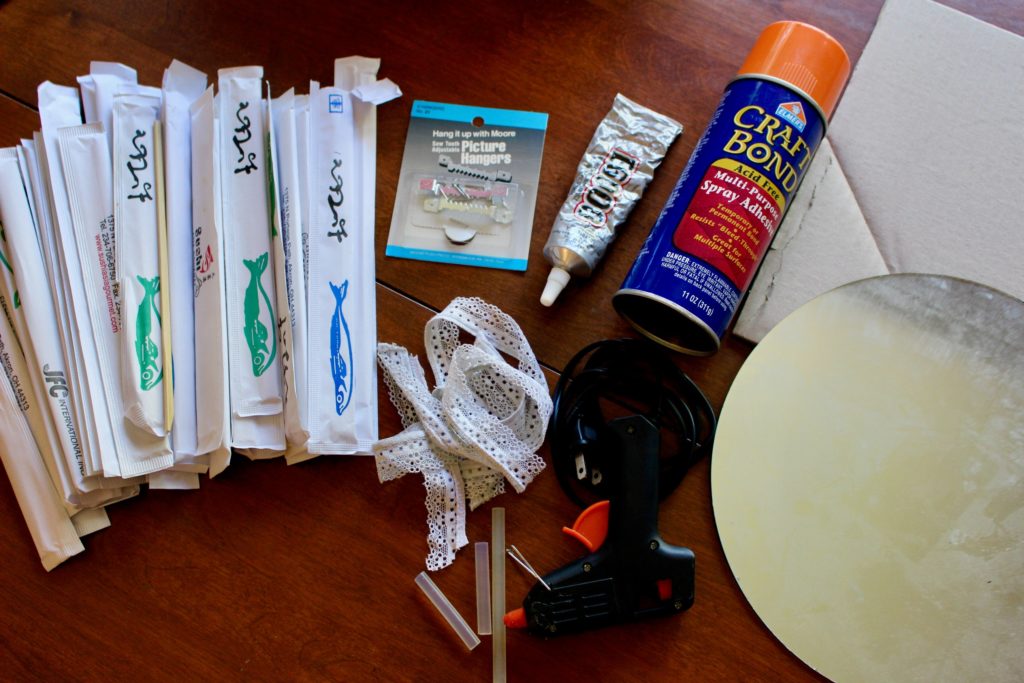
- Some kind of wooden skewer – I have been “collecting” chopsticks over the years because I wasn’t sure how to recycle them and didn’t want to just throw them in the garbage, plus I’m terrible at remembering to ask for “no utensils” when we order carry-out, so I had a bunch on hand that were perfect for this DIY
- Plastic straws or silverware would also be a GREAT alternative if you don’t have skewers on hand
- A mirror – if you don’t have a small circle mirror lying around, an old picture frame, or ANY fun trinket that could use a starburst treatment that you want to hang would be great alternatives
- Hot glue and glue sticks, E6000 glue
- A bit of cardboard
- (Not Pictured): Spray paint, bit of styrofoam, string of craft pearls
- Pictured below, but not used:
- Lace trim – I thought I wanted to trim the edges of my mirror with some scrap fabric, but decided against this halfway through the project
- Spray adhesive – I had a few ideas in mind for this: use to adhere the cardboard to the back of the mirror after all my skewers were attached OR to adhere the lace trim to the mirror. I didn’t move forward with either option, but that doesn’t mean you don’t have to 🙂
- Picture frame hanger – I had a few of these lying around from my cookie sheet memo board DIY, so thought I would use for this DIY, but decided on an alternate hanging method along the way
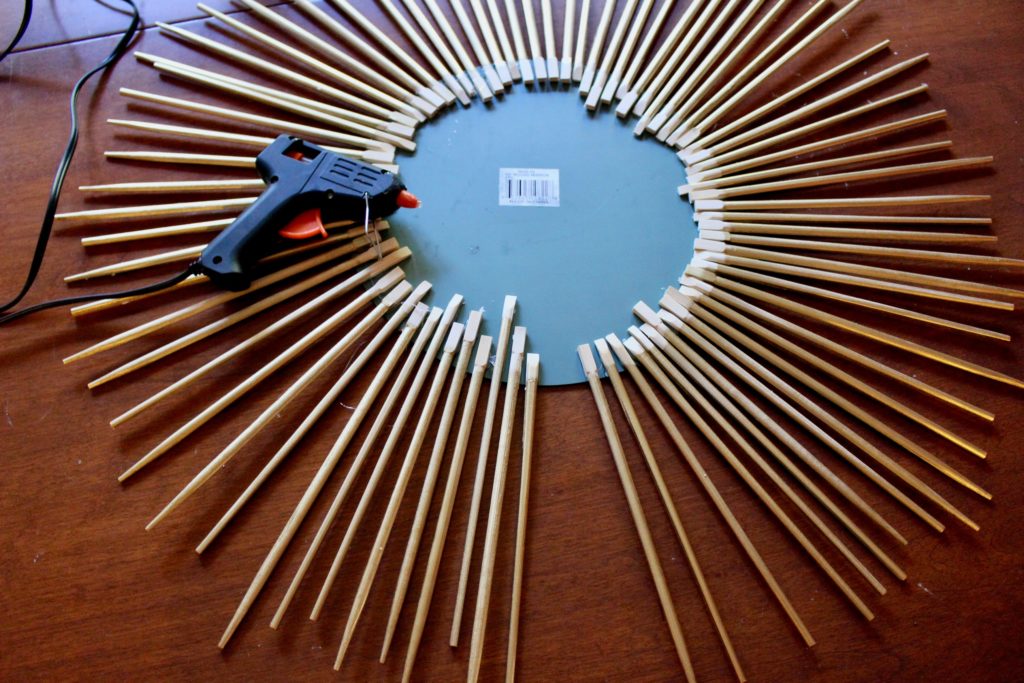
To get started, I unwrapped all of my chopsticks and laid them over my mirror to see how many I wanted to use, as well as get an idea of the general pattern I wanted. I thought about doing something deliberate (pattern-wise/length-wise with the chopsticks), but decided I liked the random effect better.


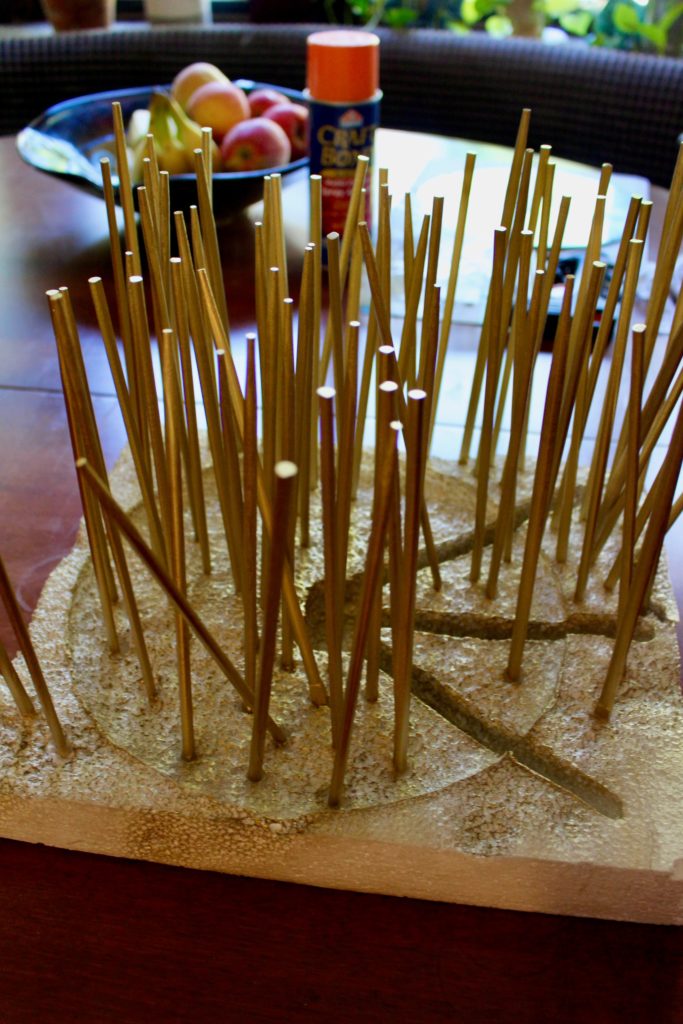
Then once I knew that I, in fact, did need all of the chopsticks I had saved up, I stuck them into a spare bit of styrofoam for spray painting. You could easily lay them on newspaper, or a covered surface, but I liked this option because I was able to spray around at all angles to get them covered well with paint.


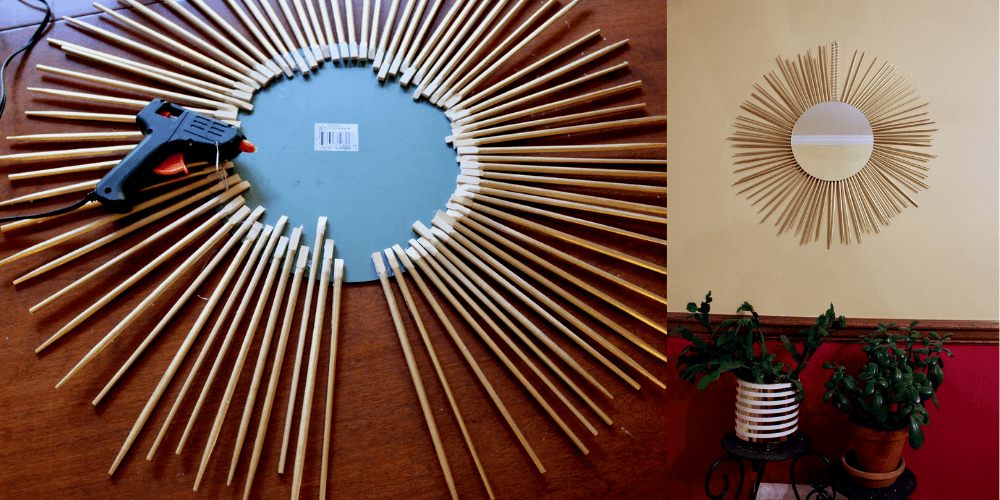
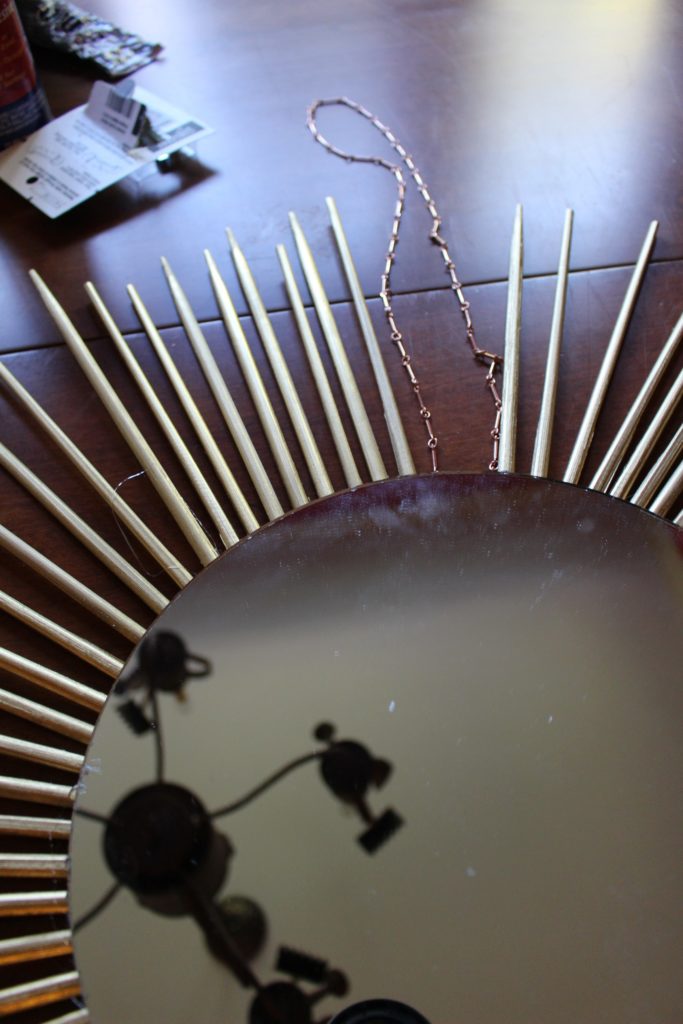
Once the paint had dried, I hot glued all of my chopsticks around the outside of the back of my mirror. As you can see, I had a bit of space leftover and no chopsticks to fill it with, so this is where my alternate idea for hanging my mirror came in.
I found an old, broken rose gold sunglasses chain that I thought might work, but ultimately decided on a string of craft pearls. For whatever reason, I’m still so uncomfortable with mixing metals, and preferred the white and gold together vs. the rose gold and gold.
To finish off, I used some E6000 glue (and a few staples) to attach the pearls to the bit of cardboard, and some more E6000 glue (the little clear dots below) to attach the cardboard to the chopsticks.


And there you have it – your own star burst mirror! I love the slight imperfections in mine, but feel free to be as precise or as imperfect as you’d like!


I haven’t quite landed on a final home for it yet, but imagine it long term hanging in my eventual entryway family photo gallery wall. Where would you hang yours?
Can’t wait to see how you put your spin this DIY! Feel free to tag @goodwillakron or @bottesdeleanor if you share on social!
Good luck and happy crafting!
_Abby