
Happy Spring, my friends! Abby here – Can you smell that? It’s the smell of spring – fresh air and sunshine are hitting extra special this year. How about you?
In honor of what seems like an extra special Spring Equinox, thought I’d share a cheery, floral DIY with you all. I won’t lie, this project has been on my DIY list for probably close to 4 years. No clue why I’m just now getting around to it, but today’s the day!
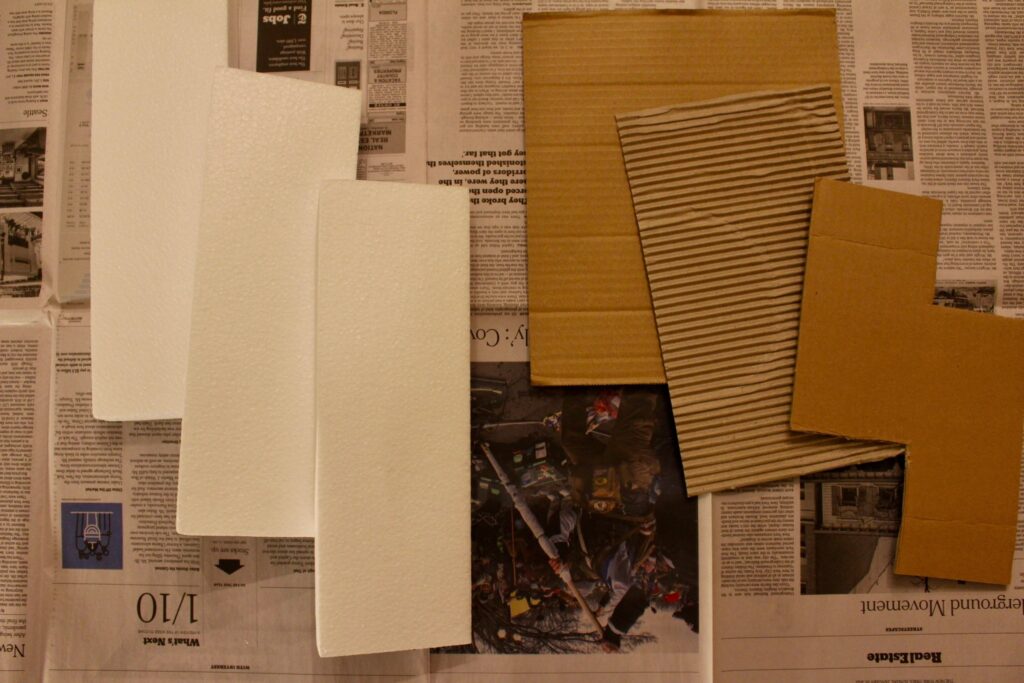
I used two different methods to make my letters: one using cardboard, and the other using styrofoam like the original project. In the end, I think I like the cardboard version better, but experiment and see for yourself.


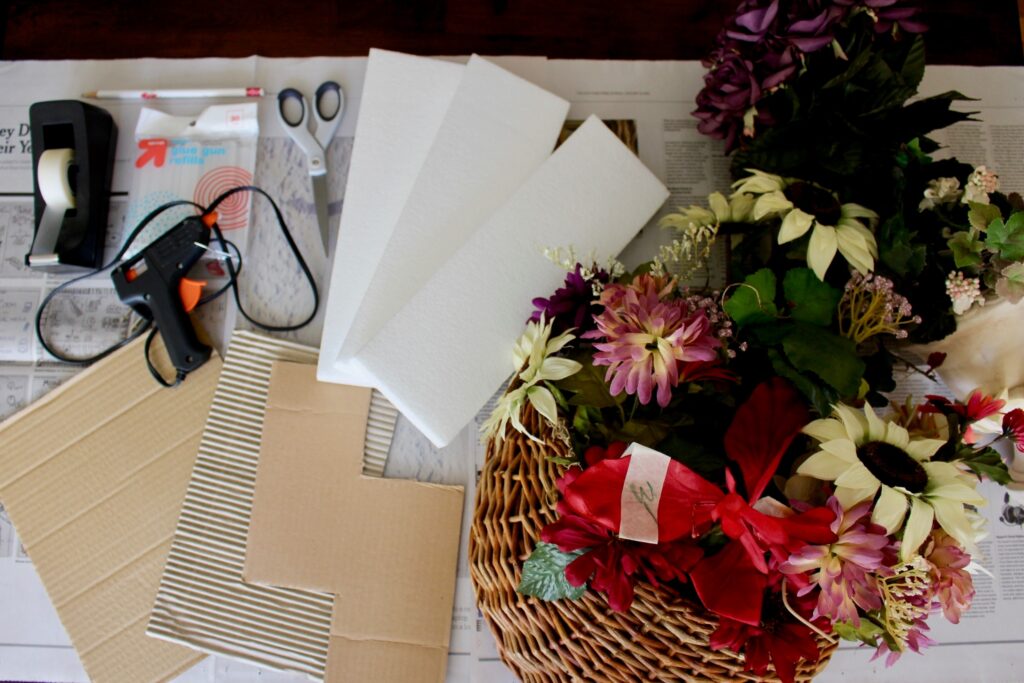
To create your own Floral Letter Wall Hanging, you’ll need:
- Styrofoam – I bought some from Target, but feel like a jerk, because I imagine we had some from past packages that would have worked just as well, if not better
- Spare cardboard – two kinds: one super sturdy, and another that’s a bit more flexible
- Hot glue and glue gun
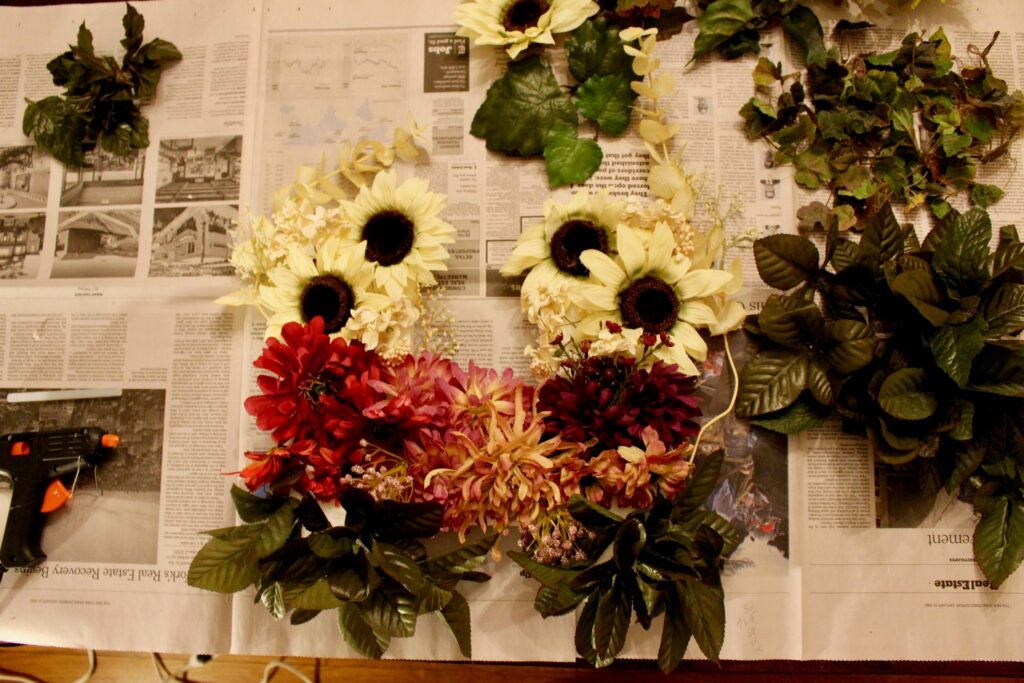
- Fake flowers – I bought some from my local Goodwill
- Spare wire or string
- Pencil
- Scissors
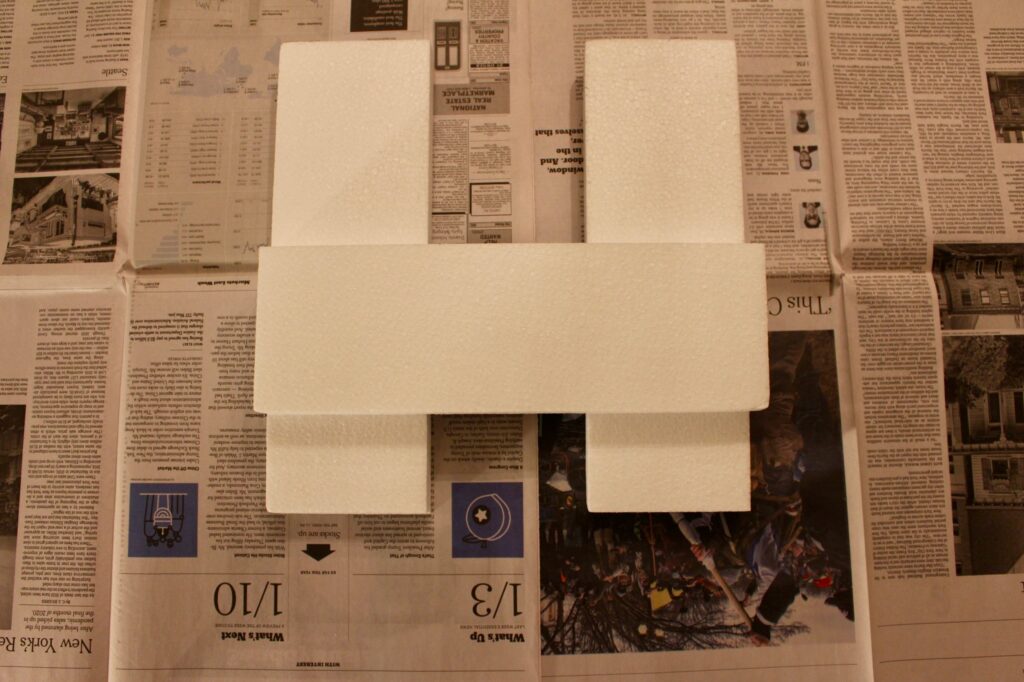
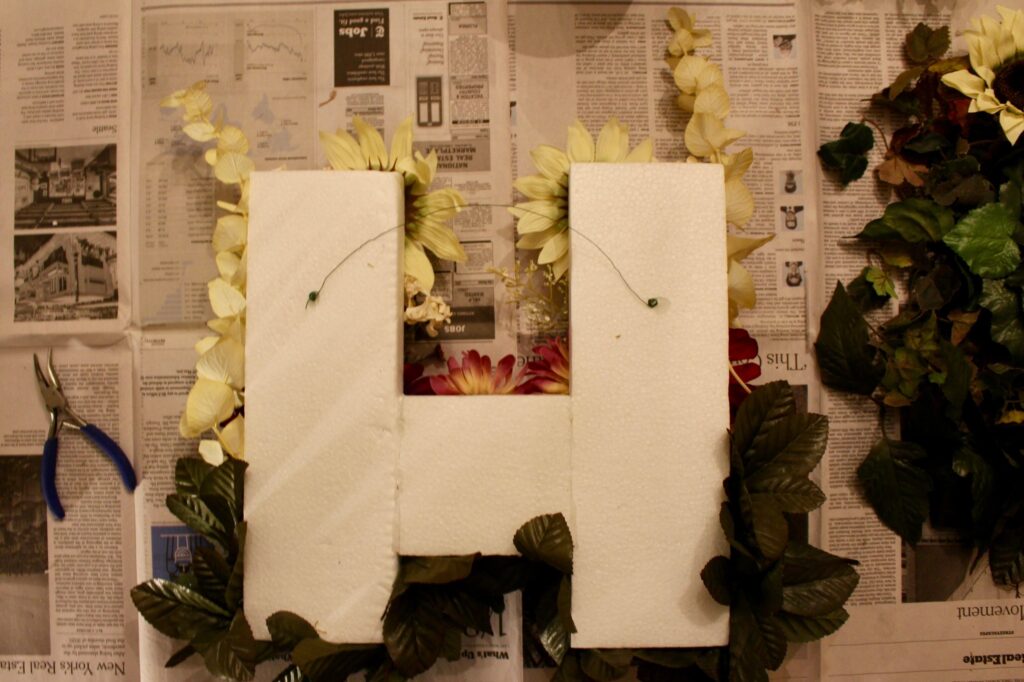
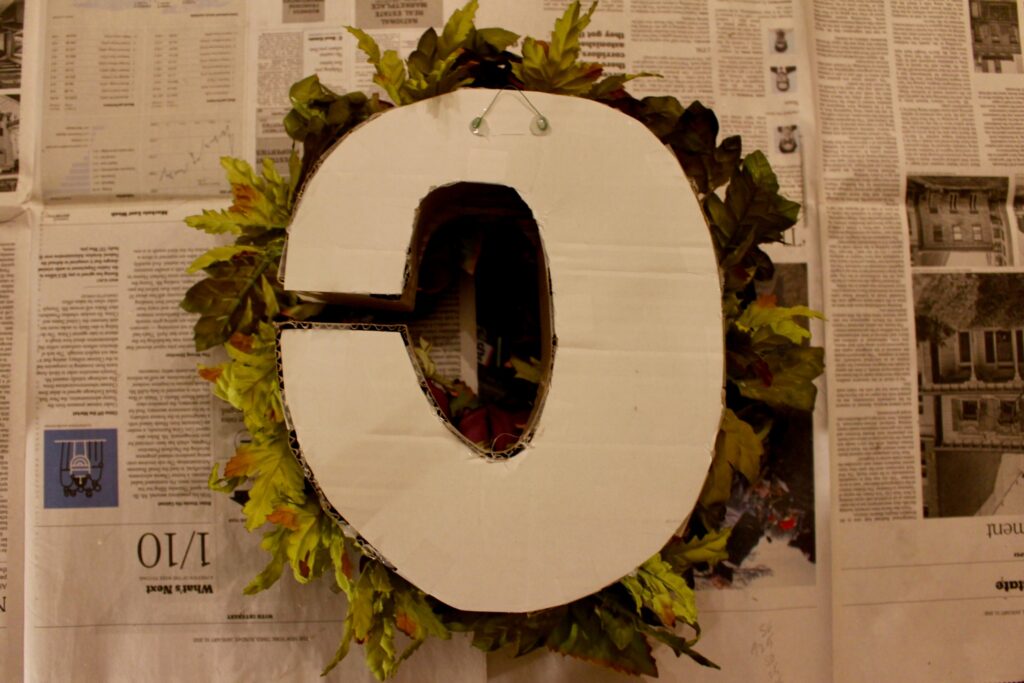
First, you’ll make your letter forms. If your letter is very straight up and down, like the “H” I made, you are probably better off using styrofoam pieces, but cardboard would probably work just as well. As I always say, the best supplies are the ones already in your craft cupboard! If you have a curvy letter, like the “C” I made, I would definitely recommend using cardboard for your letter form.
The “H” was pretty simple. I laid out my “H”, and then cut down my middle piece of cardboard to fit between the two outside pieces of my “H”. Then I hot glued the whole thing together.
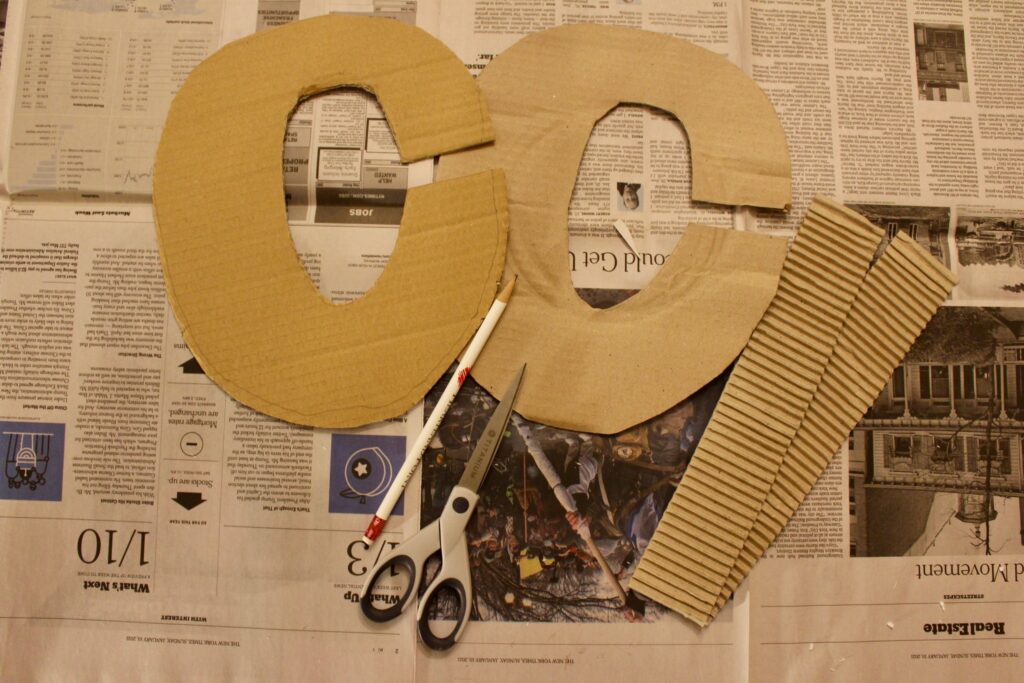
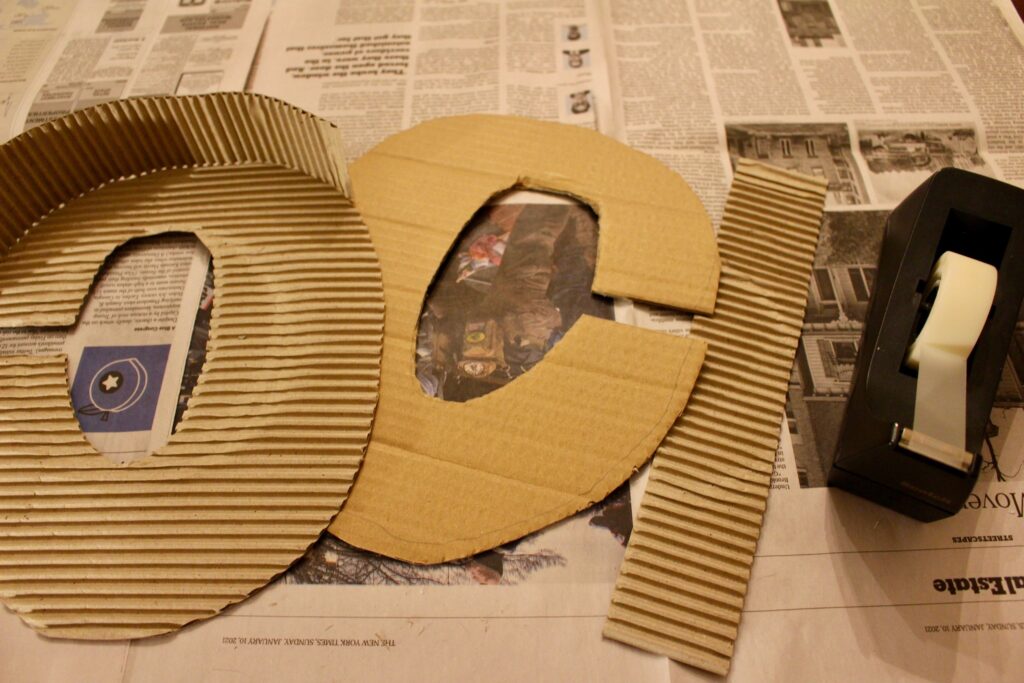
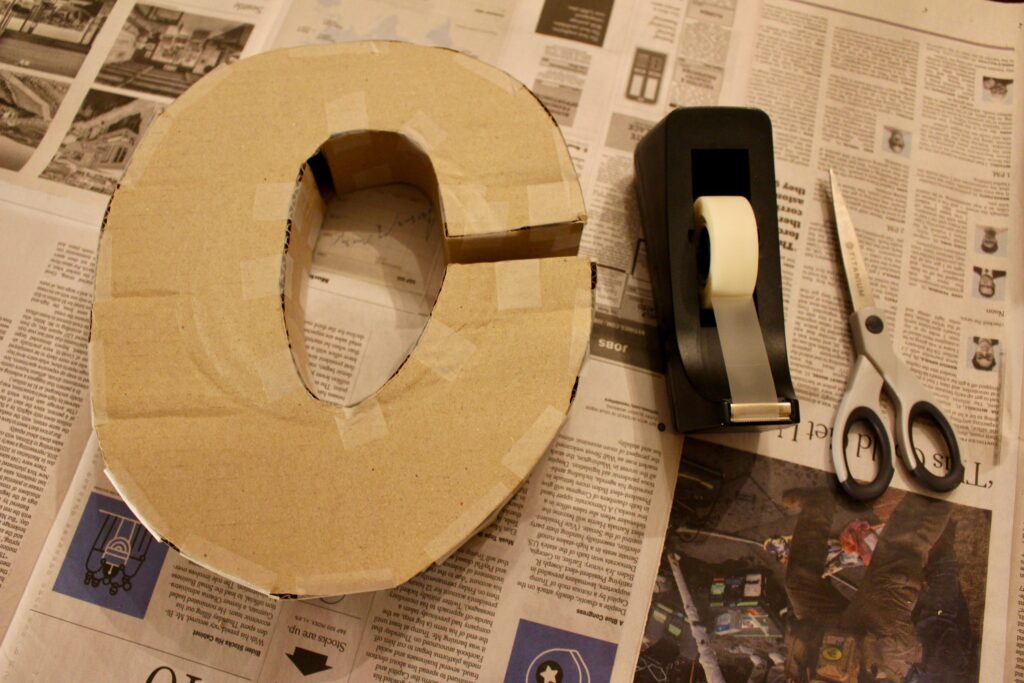
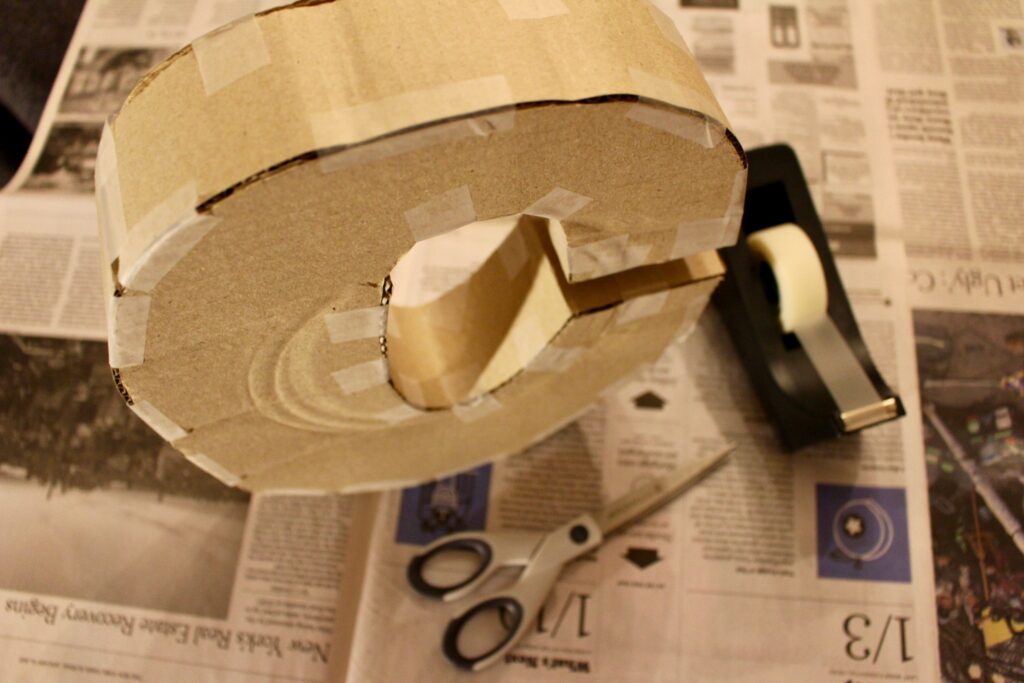
Building my 3D “C” out of cardboard was 100% an experiment. I had an idea in my head and just hoped that everything would work out. And thankfully, it did. I cut two identical “C”s out of the super sturdy cardboard, one for the “top” and one for the “bottom”. Then I cut a few two inch strips of cardboard from the more flexible kind to use to connect the top and bottom “C”s. I used tape to connect all the pieces together, but then added hot glue later in the process. Also, a sturdier tape than scotch tape would probably work better here.
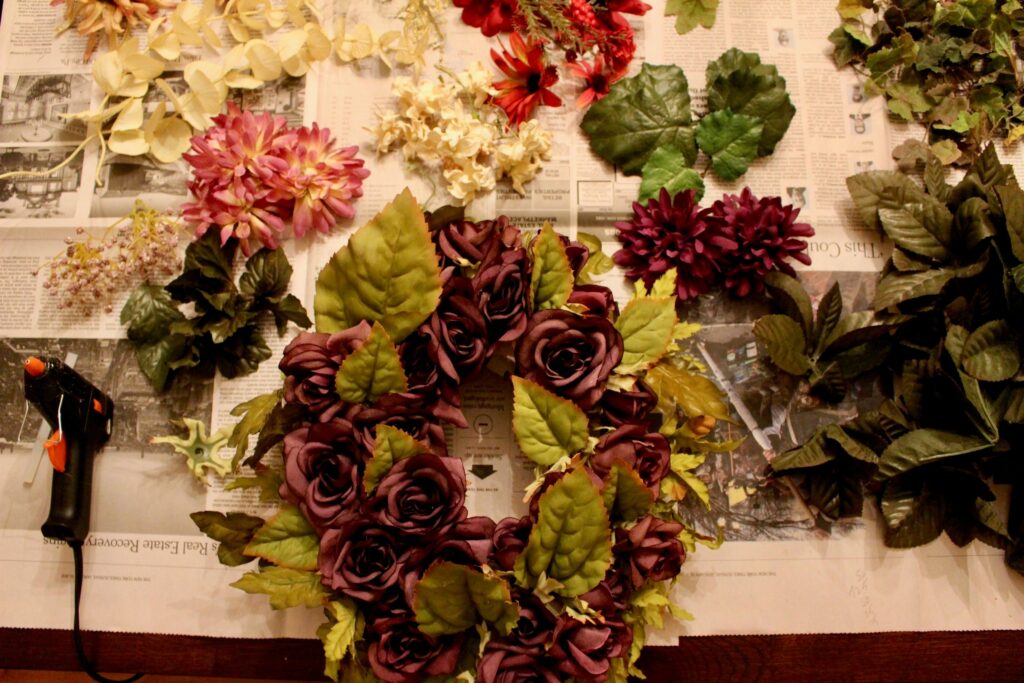
I didn’t photograph this part of the process, because it was pretty messy, but I disassembled the floral arrangements I purchased at my local Goodwill. I really just looked for arrangements that had similar colors and would go well together because I didn’t want to get my hopes up for a specific color story. I also wanted pieces with lots of greenery for filler, as well as future projects. I lucked out and found two arrangements with lots of purple, red and white flowers, as well as lots of greenery (pictured above). Bonus points, as the holders the fake flowers were in will double as flower pots later down the line!
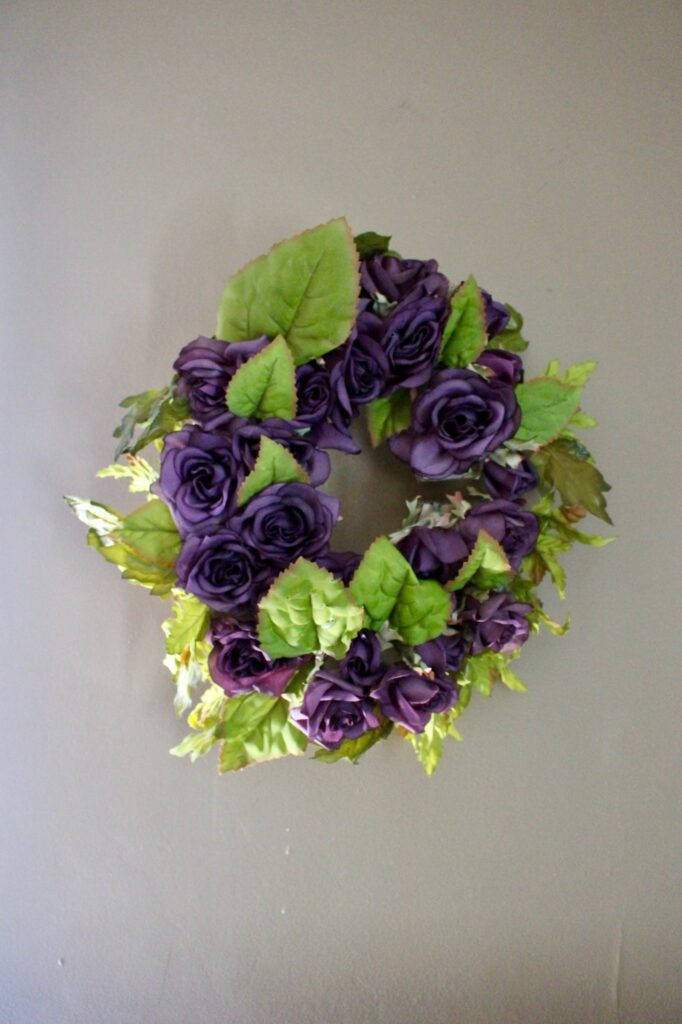
Once your letter forms are all built out, now you can decorate with your flowers! With both forms, you can either stick your flowers into the form, or you can hot glue direct to the surface. I did a little bit of both. For my “C”, I used mostly purple roses and some greenery as filler.
For my “H”, I did a bit of an ombré effect, starting with light at the top and getting darker towards the bottom. I also wanted the “H” to look like an actual floral scene, i.e. light sky at the top and greenery/leaves at the bottom. It ended up looking like a bit of a monster, complete with antennae, but my toddler loves it, so all’s well that ends well.
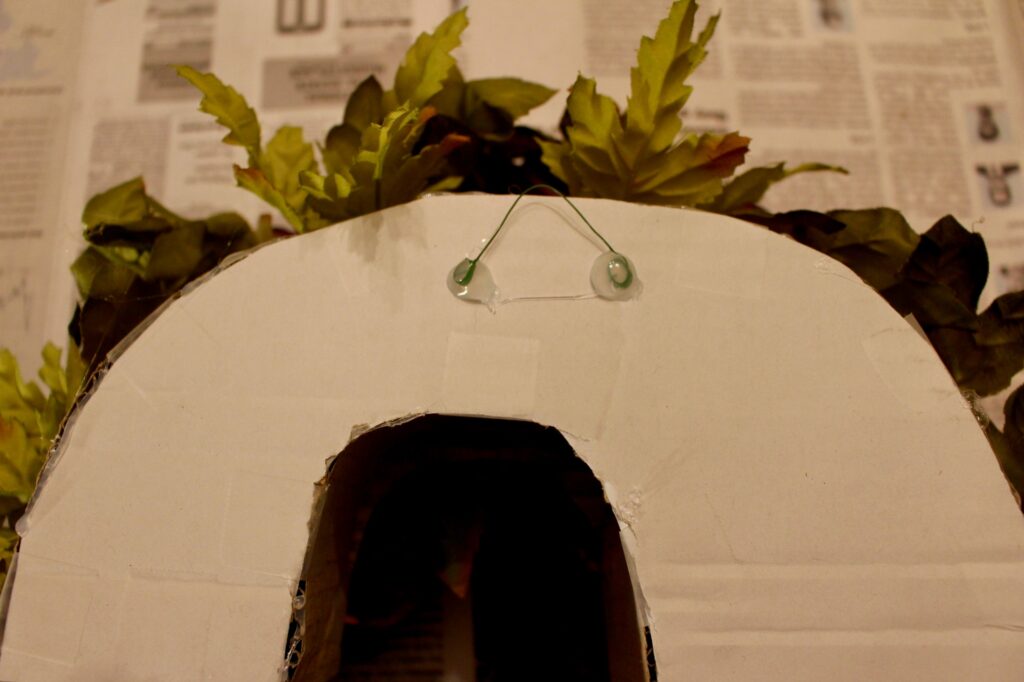
Once all the flowers are dried on the top and sides, now’s the time to figure out how you are going to hang your masterpiece. Because my letters are pretty lightweight, I hot glued a bit of floral wire to the backs, but if your letter ends up being a little heavier, a picture frame hook/hardware would work well.
I gave my hook wire and glue about a day or two to dry, and then I hung up my letters in my boys’ rooms. The “H” and the “C” are the first letters in their names (not sure I shared that up front).
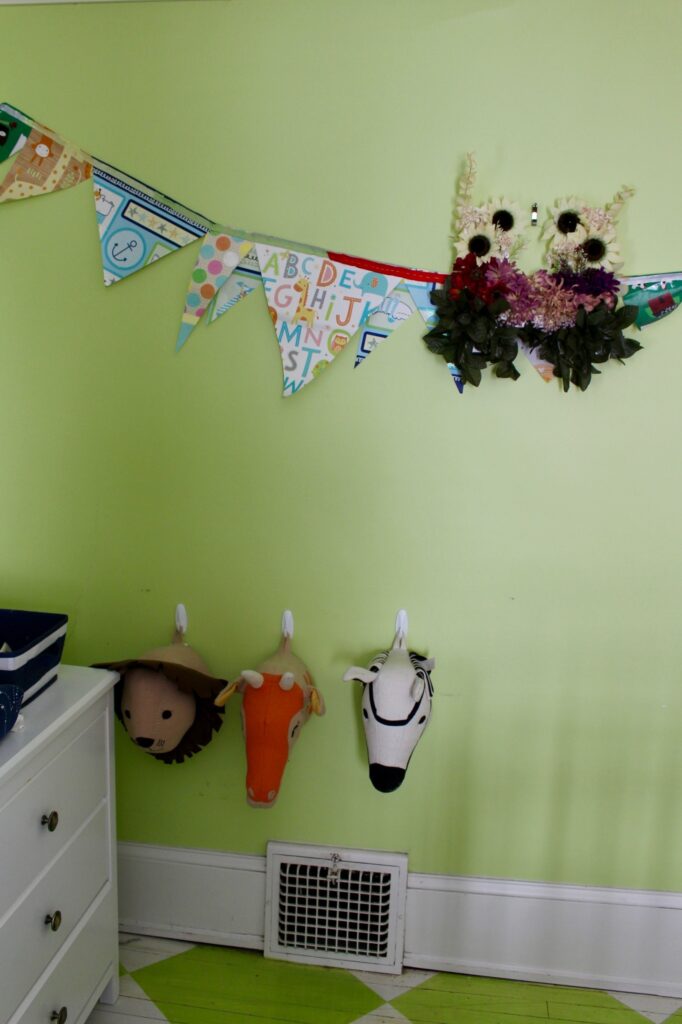
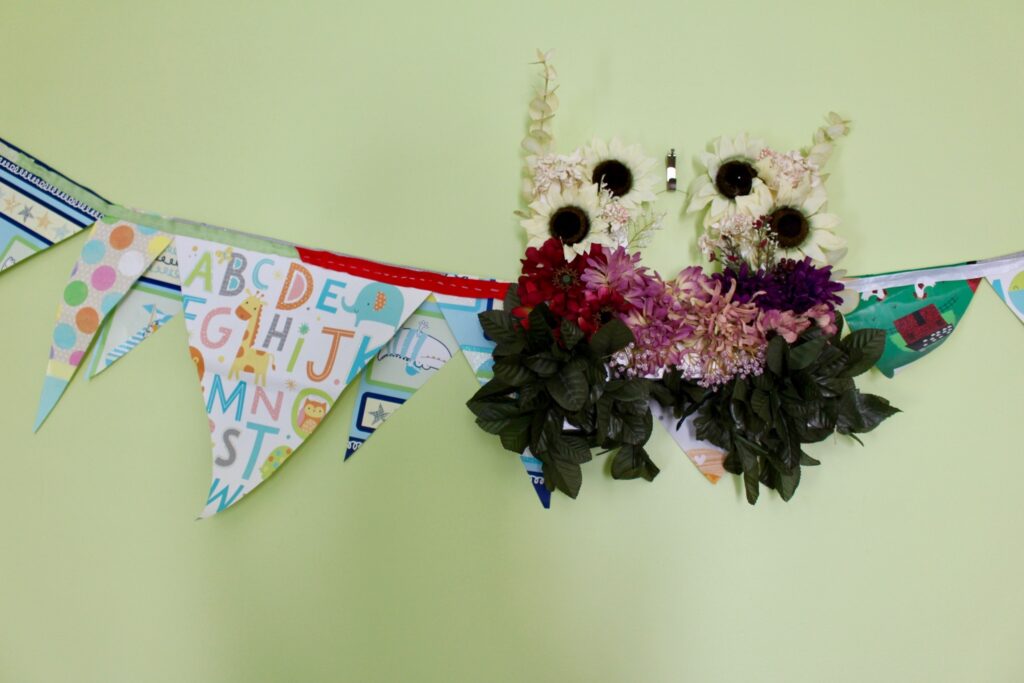
I love how Harvey’s looks paired with his pennants I made from gift bags from his baby shower (super easy DIY – let me know if you’d like the how-to since I still need to make Clive’s).
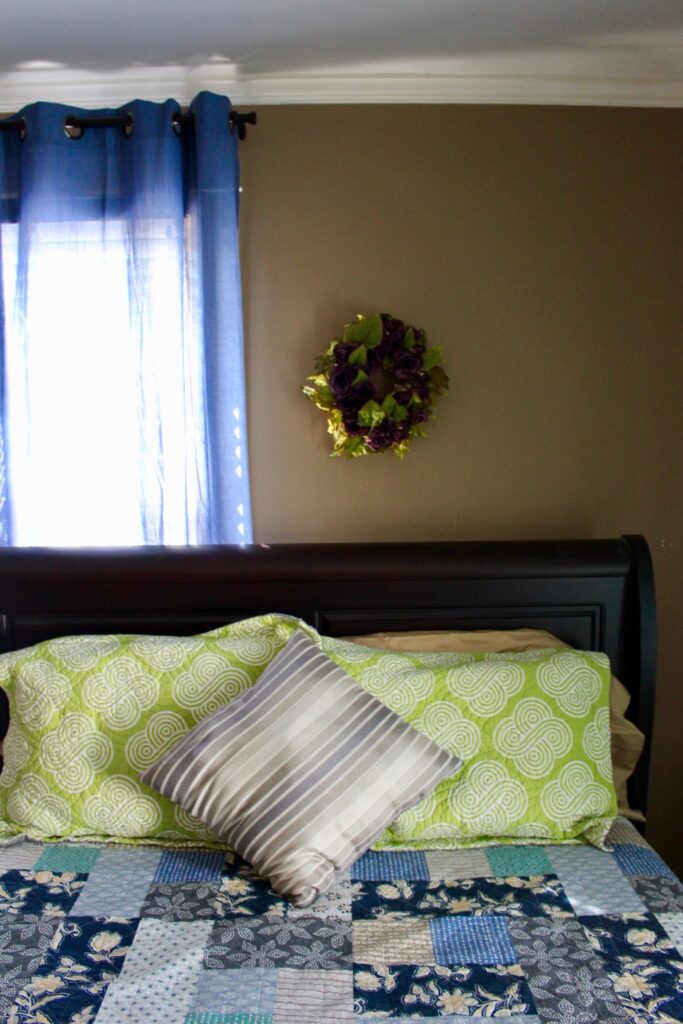
Clive’s looks a little sad all alone, but his current room is temporary as we save to get the windows replaced in his “real” room (his crib is to the left of the bed – this room was clutch when he was a newborn, and we could hang out together on the big bed).
Eventually, I may move these to a family photo gallery wall, but for now, they bring a bit of cheer to the boys’ rooms, as everything wakes up outside. When in doubt, bring the outside in (or a fake version of it)!
What do you think? Will you make your own version? If you do make your own floral letters, we’d love to see it/them! Share with us on social, @goodwillakron or @_abigaildrennen!
Happy spring crafting!
_Abby