I hope you enjoyed last month’s blog post about customizing thrifted items with patches. My kids have worn their jackets on repeat ever since we made those and even some of their friends want some made for them now.
In this post, I am continuing with part two of how to customize thrifted items with how to do a simple embroidery on your own clothing to make it fun, personal and creative. I have seen embroidery popping up in my Instagram feed and the simplistic, minimal accents have caught my eye but when I would click on the item, they can cost $50-$70+ per piece. I have seen a lot of embroidery on sweatshirts and t-shirts and knew I wanted to see if I could thrift a sweatshirt and do my own embroidery for a fraction of the cost.
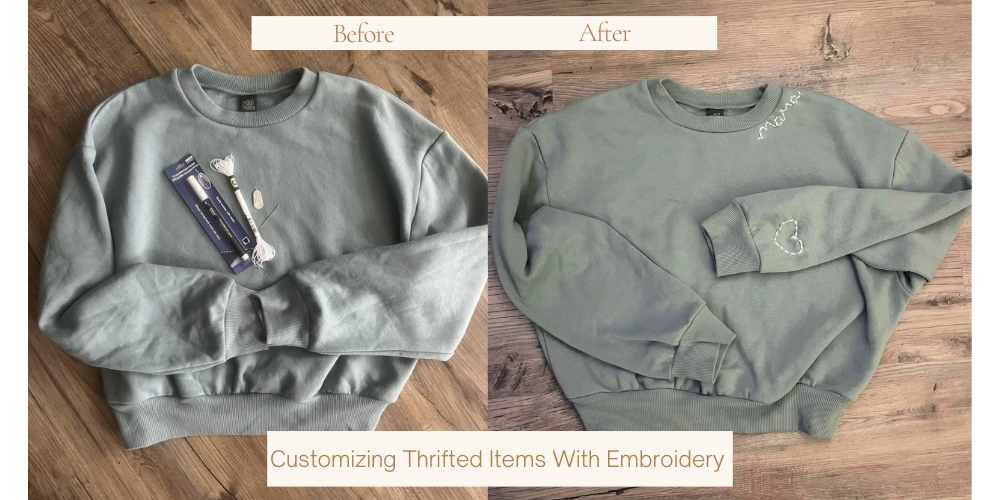
I knew mine would not look as good and perfect because I do not have a machine, but I knew I could do a name around the collar and something on the sleeve like I had seen from an influencer on Instagram. The process is quite simple, the supplies are minimal and it was relaxing to try my hand at something new while watching TV with my husband one night. Like anything else, your first try may not be the best, but practice makes perfect and I also like the little imperfections and I know with time, I will get better. I found a like-new sweatshirt while thrifting and only had to buy a few other things from a craft store but also know I will get more use out of those supplies for other projects. I always recommend checking craft store apps and using their coupons to save even more on your DIY projects.
What you Need
An article of clothing (a T-Shirt or sweatshirt works best)
A fabric marker
Embroidery Floss/Thread
A wide eyed needle
A needle threader
Scissors


- The first step is to wash your article of clothing and make sure it is clean. Iron or steam the item if it is wrinkly and lay flat on a surface.
- Before you write on your clothing, practice the word or shape first on paper and use that as a guide. When you have the wording like you want it to appear on your clothing, write the name, word or shape on your clothing with the fabric marker. The great thing about these markers is that they wash out very easily and are very forgiving.

- Once you have your word, name or shape drawn on your item, you can now thread your needle. The embroidery floss is very thick, so make sure you use a needle that has a wide eye so it is easy to thread. I like to use a needle threader to pull the thicker thread through the needle to make it easy, otherwise it can be very frustrating and time consuming to thread it. Once you thread the needle give yourself more than enough of the floss to complete the entire word or name. Tie two ends together to make a knot and it is time to start!
- Start on the backside of your clothing and pull the thread through. You can see how much space you want your threading to be (and again this will not be perfect but it is very forgiving and I like the little imperfections) and thread it through the front to the back.
- You will continue this simple threading pattern through the name, word or shape you have and when you are finished you will tie it off to secure it to the back of the clothing and cut the thread.

I love how mine turned out! I did “mama” at the collar and a little heart at the bottom of the sleeve. This lookalike $60+ custom sweatshirt cost me a whopping $7 with all of the supplies and I have more products to make more custom shirts for my kids!

This would be a great project to do when hanging out with friends, to customize a gift for a friend or loved one, or to customize for a vacation. Personalizing makes things so much more special and thrifting them is a sustainable way to wear those things we love.
I hope you try one or both of these projects and as always, happy thrifting!
Erin