
Hello everyone – Happy Back to School Season! Abby here with another upcycle project for you all!
This month’s post is brought to you by: GARBAGE! Or garbage that won’t be garbage when we’re done with it! If you live in Akron, you know that we can’t recycle #6 plastics anymore (and haven’t been able to for a while, sad face). I HATE throwing plastic away, especially if at one point in time I was able to recycle it, so I’ve been sort of hoarding our #6 plastics until I could come up with a better solution for what to do with them than throw them away. Luckily, I didn’t have to wait long! I happened to fall upon DIY shrinky dinks on social media, and well, now I’m hooked.
SO I wanted to share how I made my own in case you have #6 plastics hanging around/feel bad about throwing them away.
Read on for how to make your own shrinky dinks!
To make your own shrinky dinks, you will need:
1. #6 Plastics (usually used for takeout containers or baked goods at the grocery store)
2. Permanent Markers (I did a test on some shrinky dinks and dry-erase markers work pretty well, but regular markers don’t work as well)
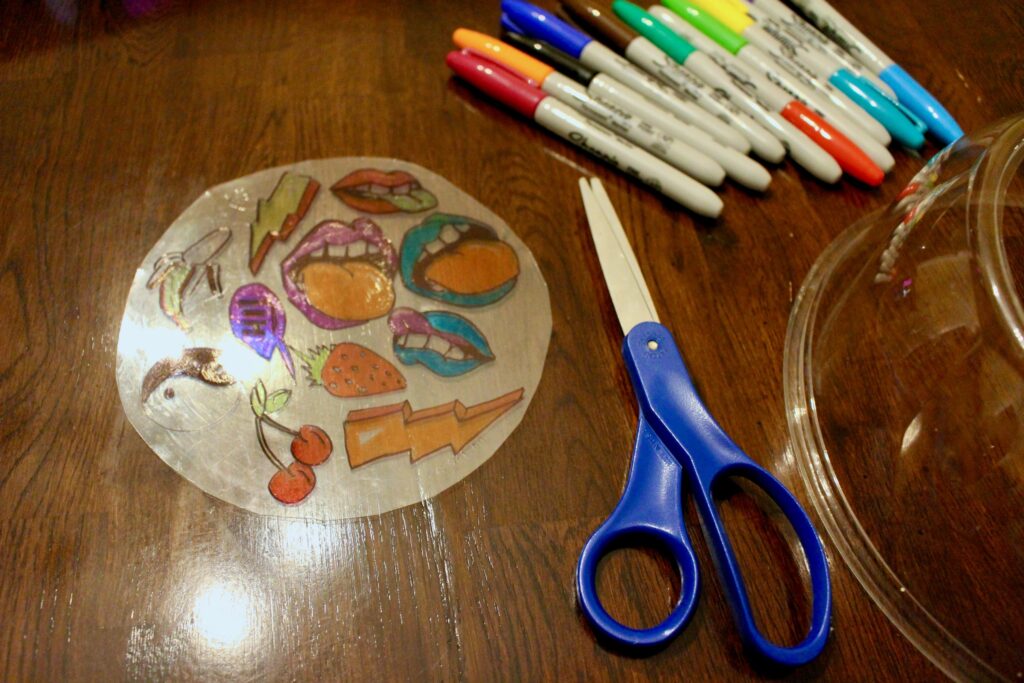
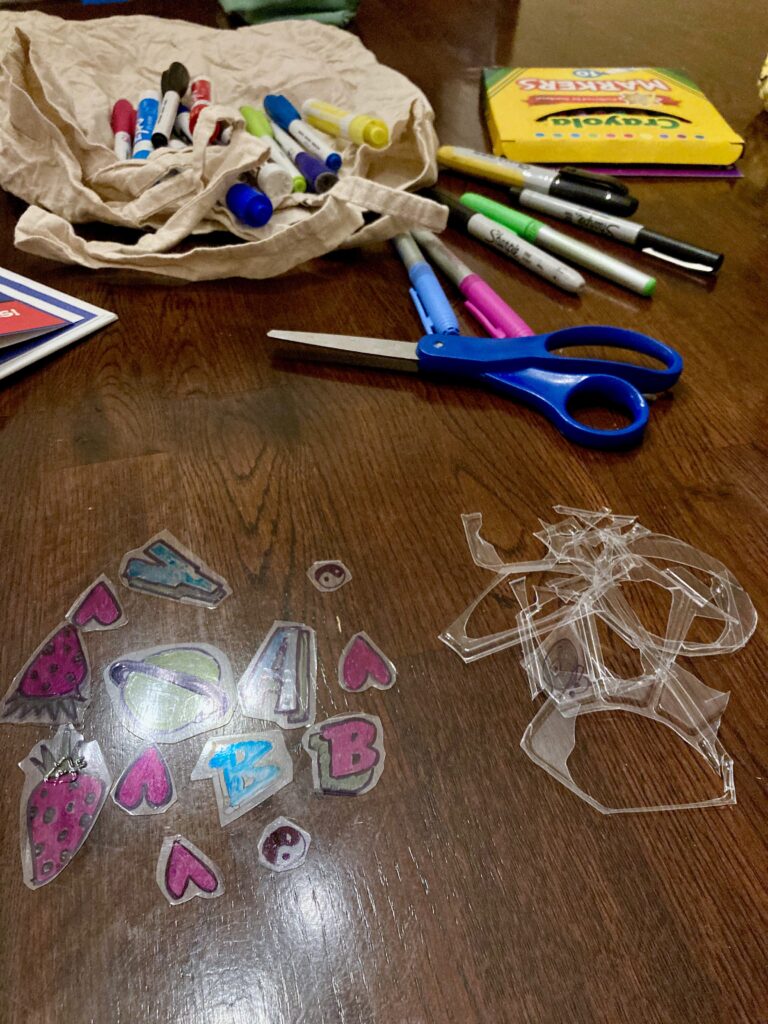
3. Scissors
4. An oven
5. Parchment paper

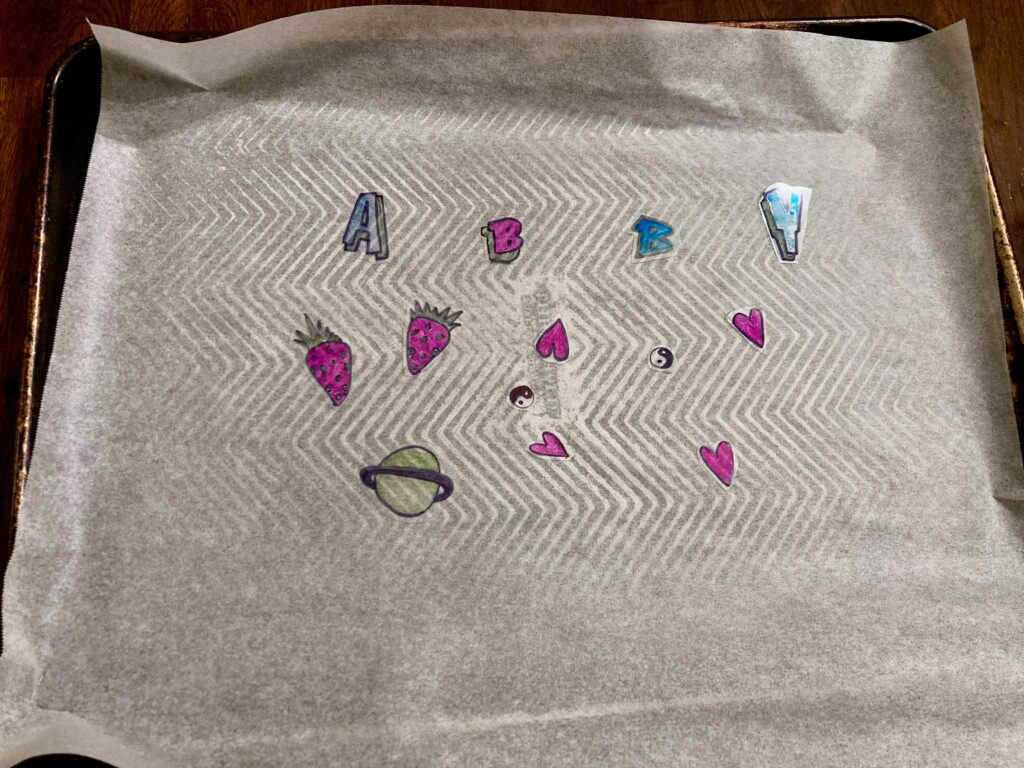
First, preheat your oven to 350 degrees Fahrenheit. Then get to drawing!
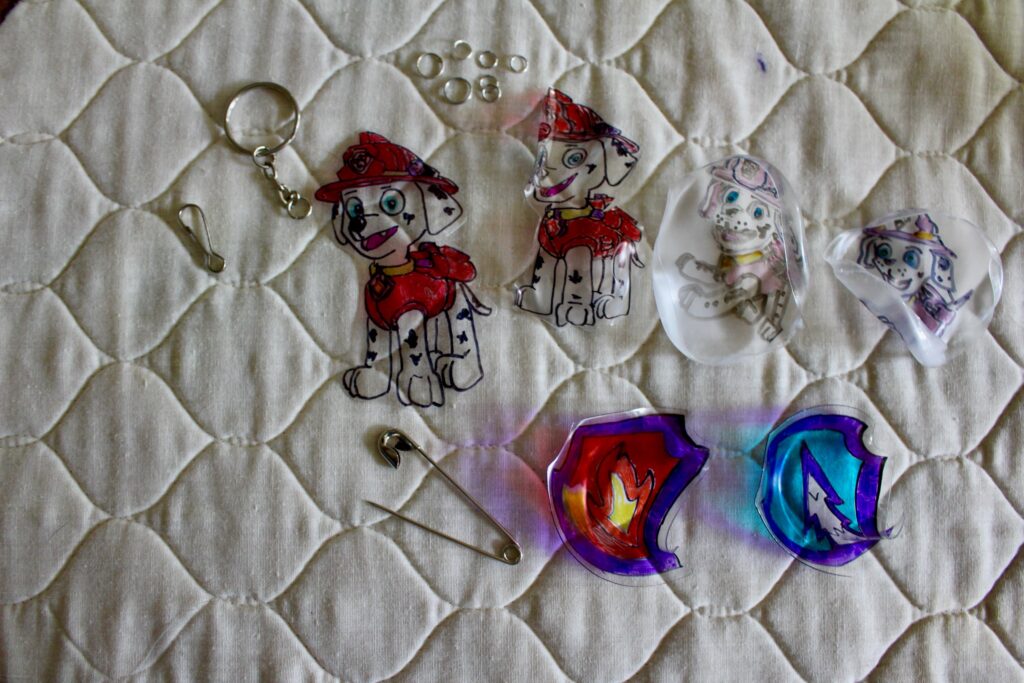
If you all know me, you know I LOVE a theme. For my shrinky dinks theme, I went with a 90s motif: yin and yang, lightning bolts, lips, bold lettering, fun fruits, bright colors, etc. I started by outlining all of my shapes with black, and then went back and colored them all in. (I also made some “Paw Patrol” ones because I have children who LOVE “Paw Patrol” and because we are working with a clear medium, you can trace!)
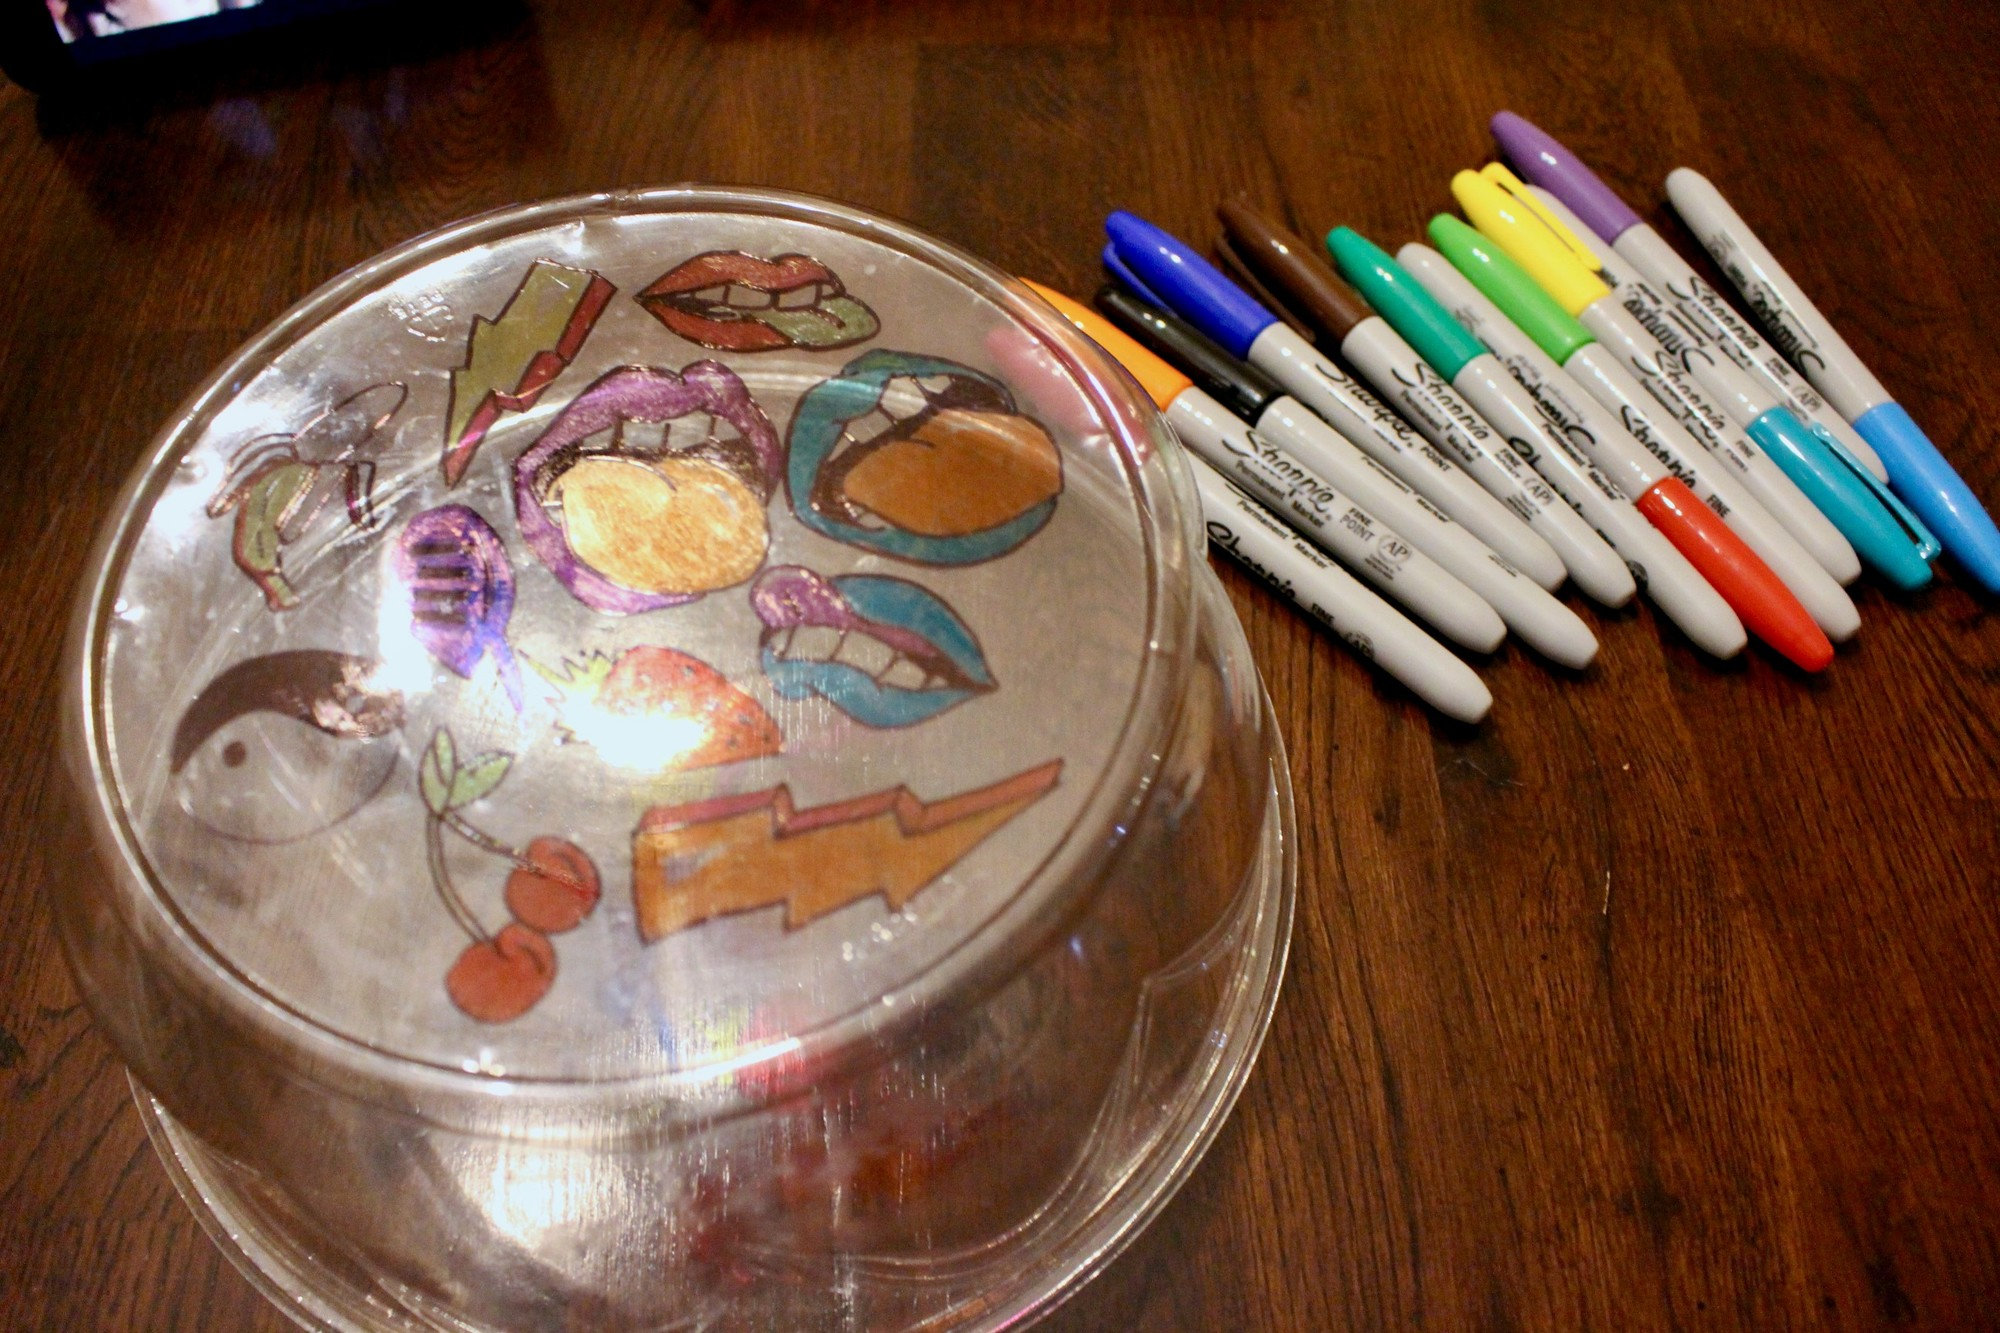
Like I mentioned up top, I experimented with a few different kinds of markers: permanent markers, dry-erase markers and regular markers. The regular markers were the only ones that didn’t “bake” into the plastic and sort of rubbed off when I was done making my shrinky dinks. If those are the only markers you have at home, USE THEM! Just be cautious you don’t rub off your beautiful colors when you are done. They should eventually dry in and not budge.


Next, you’ll cut out your shapes individually.
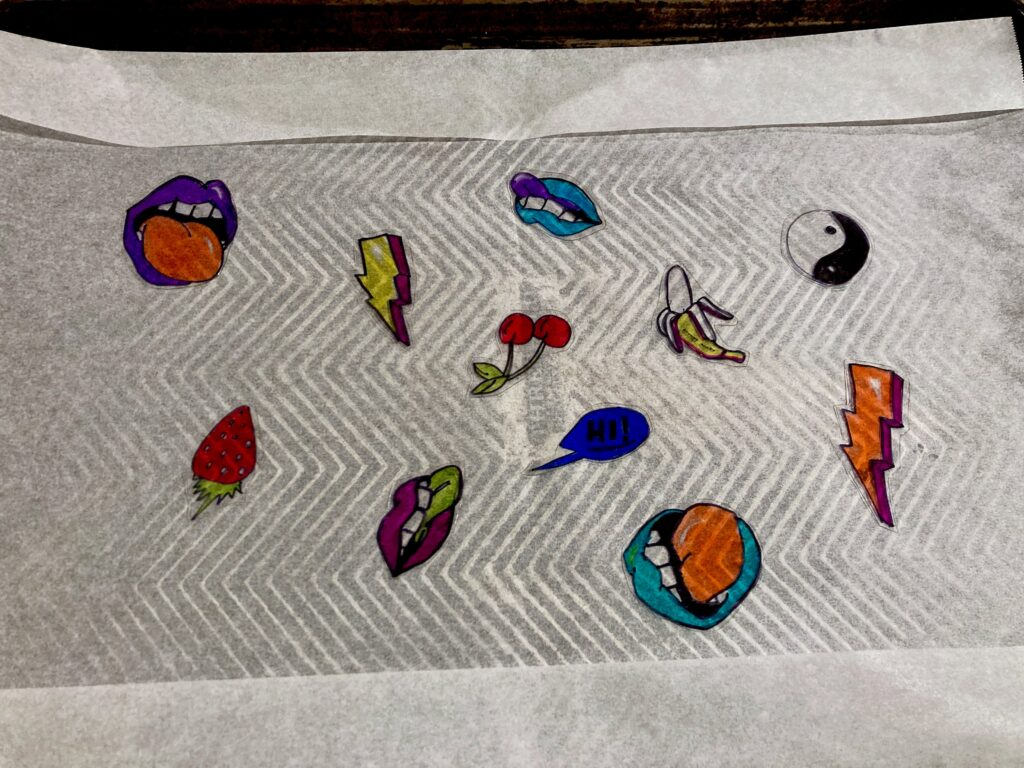
Then, you’ll place all your little drawings on some parchment paper on a baking sheet, and bake them in the oven for 30 seconds to 2 minutes. They shrink up pretty fast, so keep an eye on them.


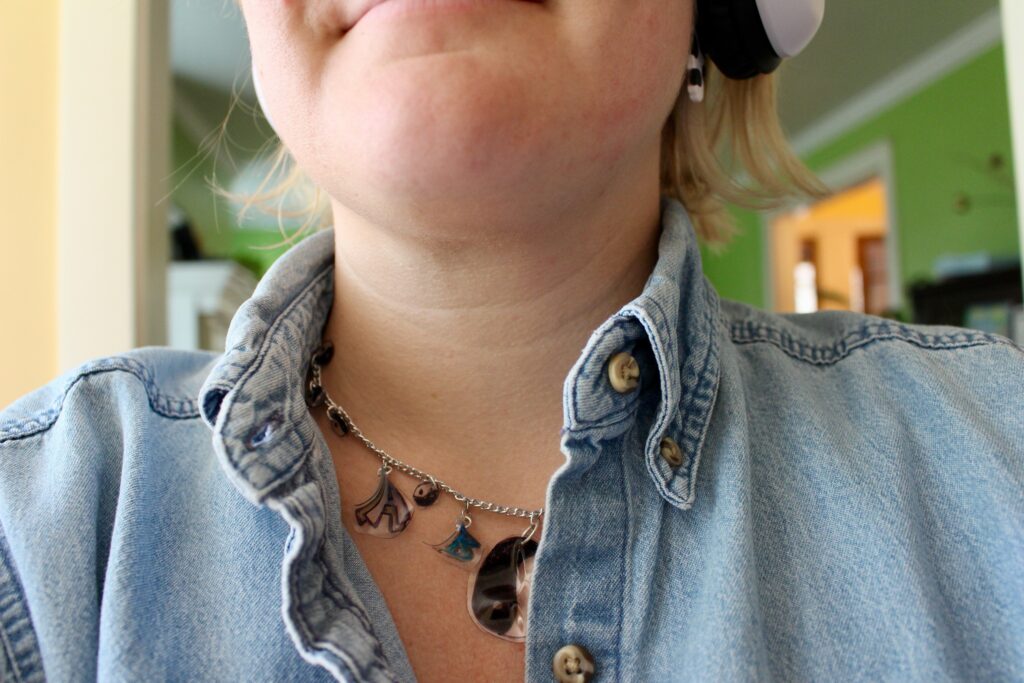
Now that you have a bunch of fun, little shrinky dinks created, what will you make with them?? I made the “Paw Patrol” Marshall shrinky dinks into key chains for my kiddos, and (some of) the rest became a necklace and some earrings for me. Read on if you want to make some Shrinky Dink Jewelry!
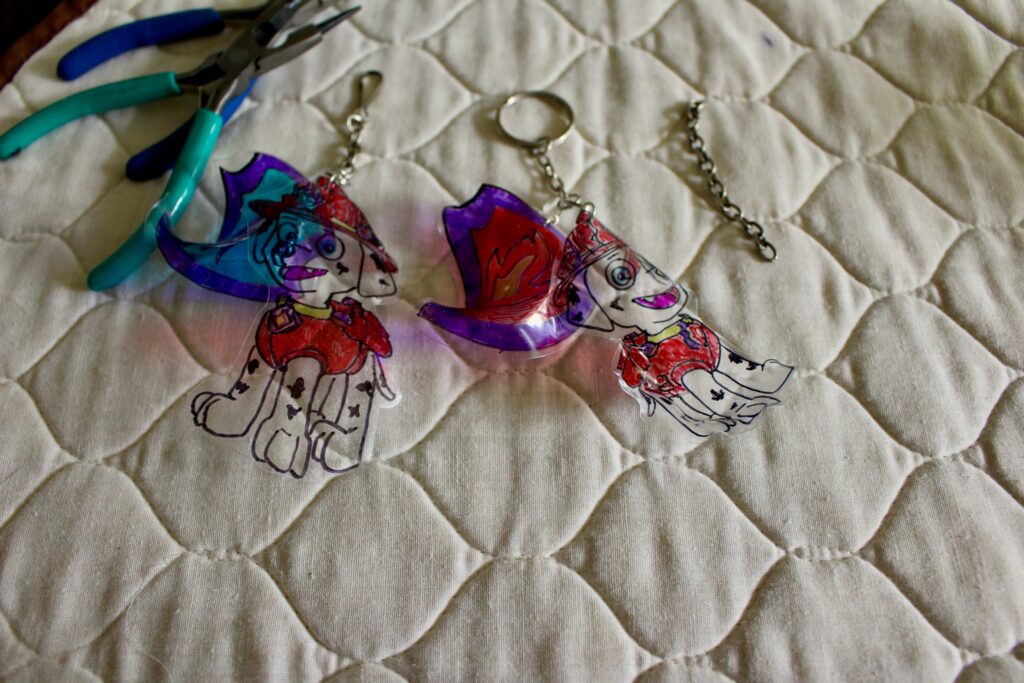
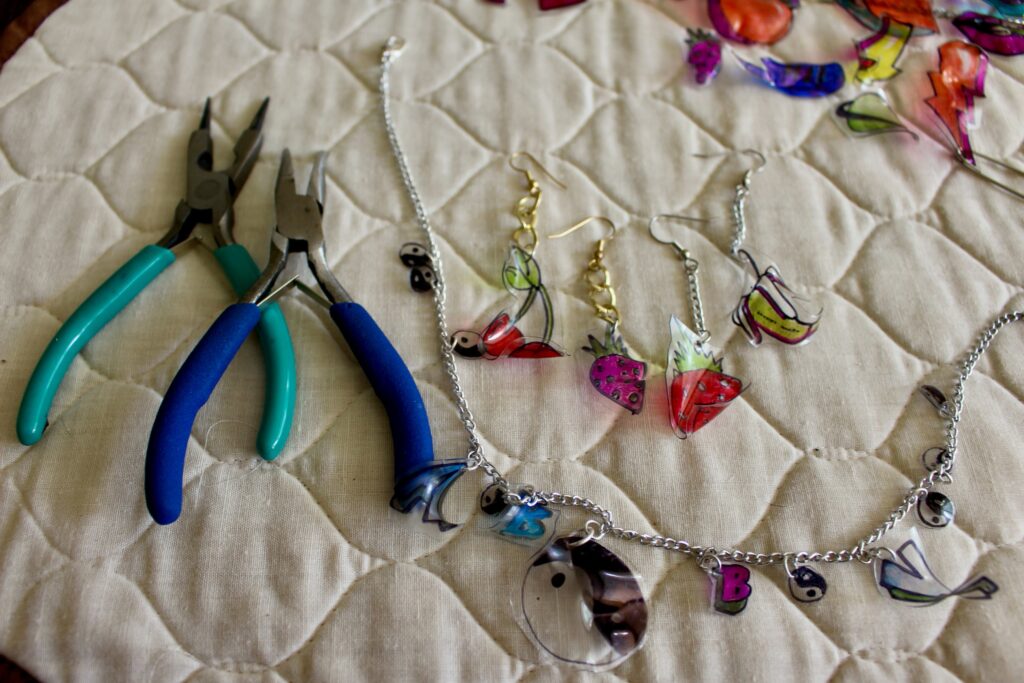
For the key chains, I poked a little hole in the top of my shrinky dinks and attached some random chain with a jump ring to the shrinky dink.
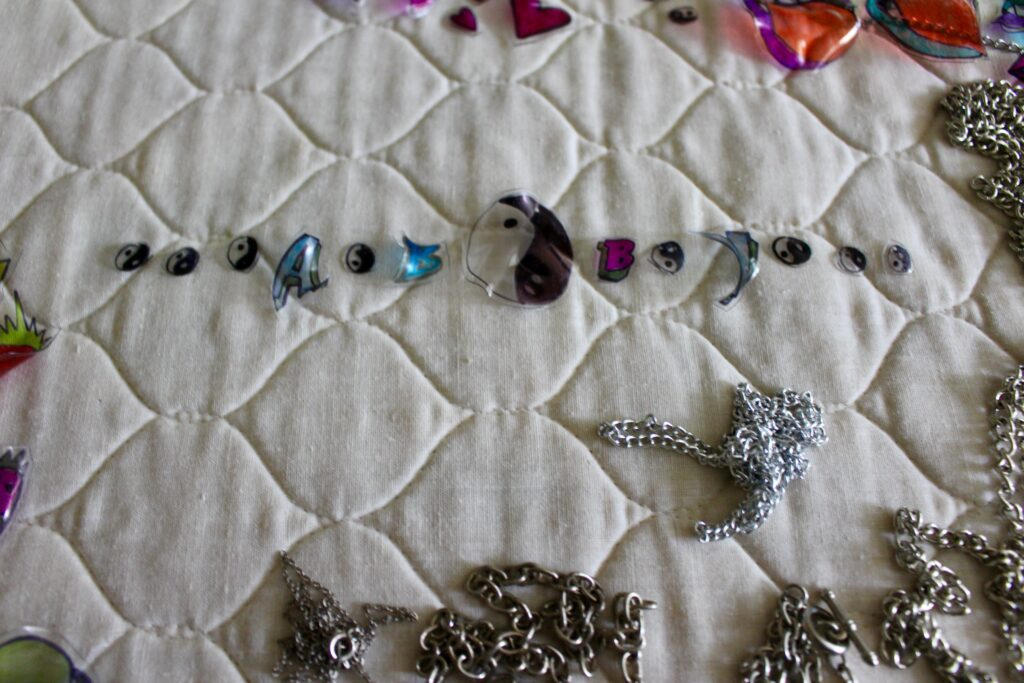
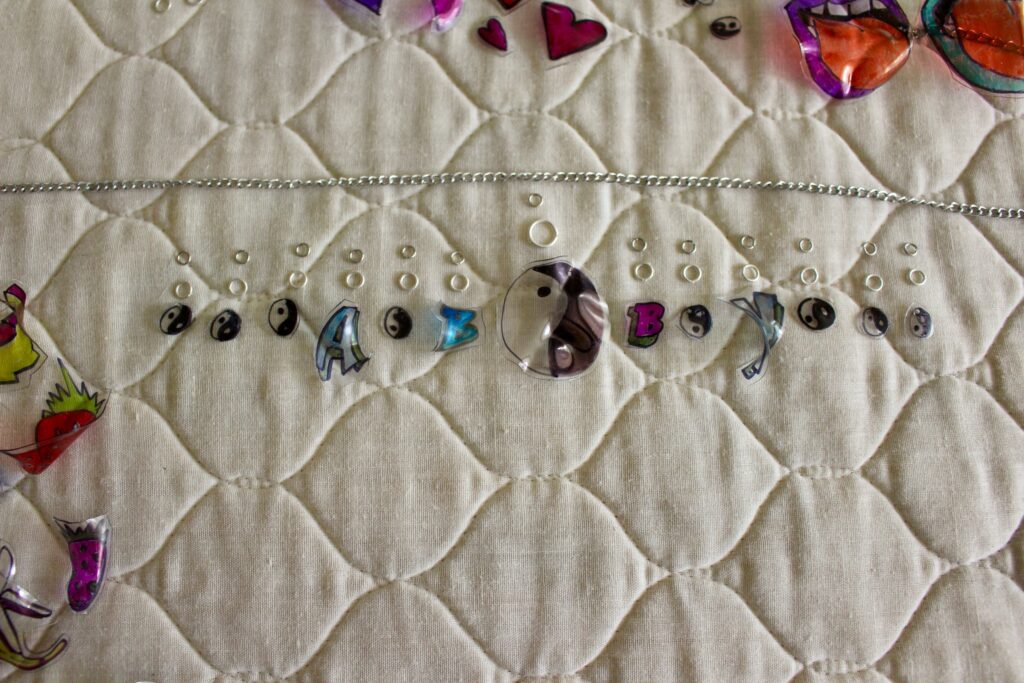
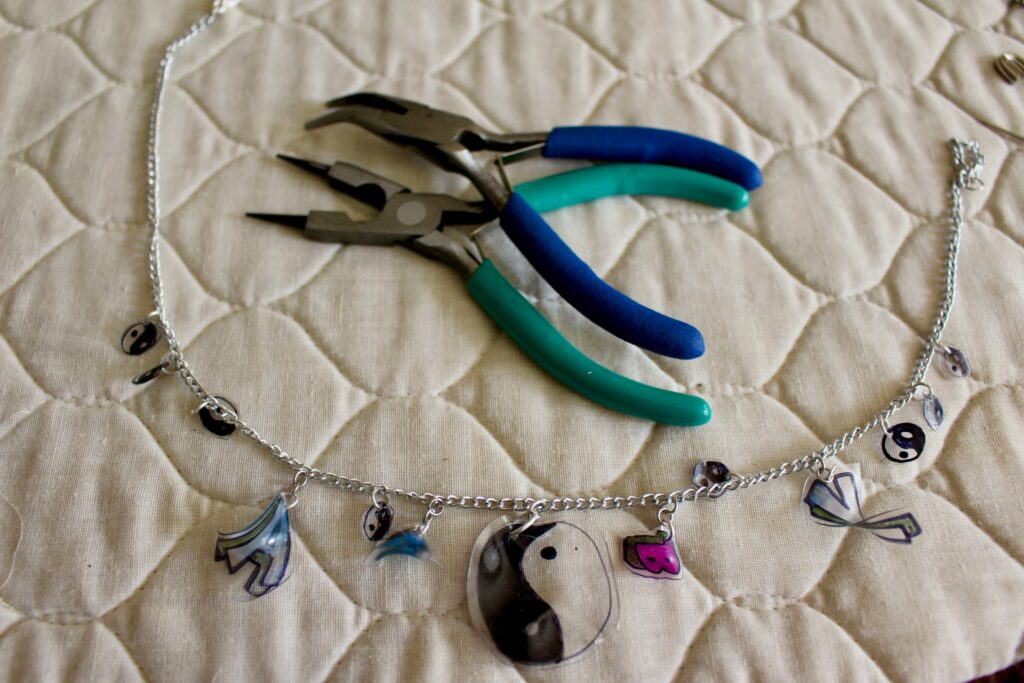
For the necklace, I decided on a pattern using the letters I created and a bunch of yin yangs. Similar to the key chains, I poked some holes at the tops of my shrinky dinks and attached them with jump rings to a bit of random chain I had around.
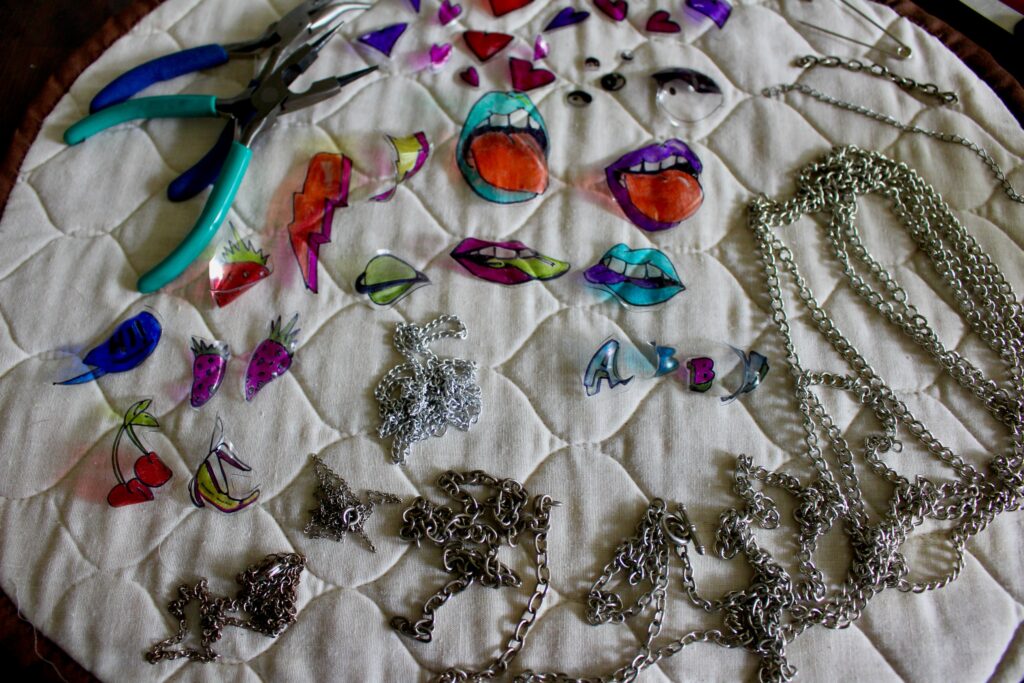
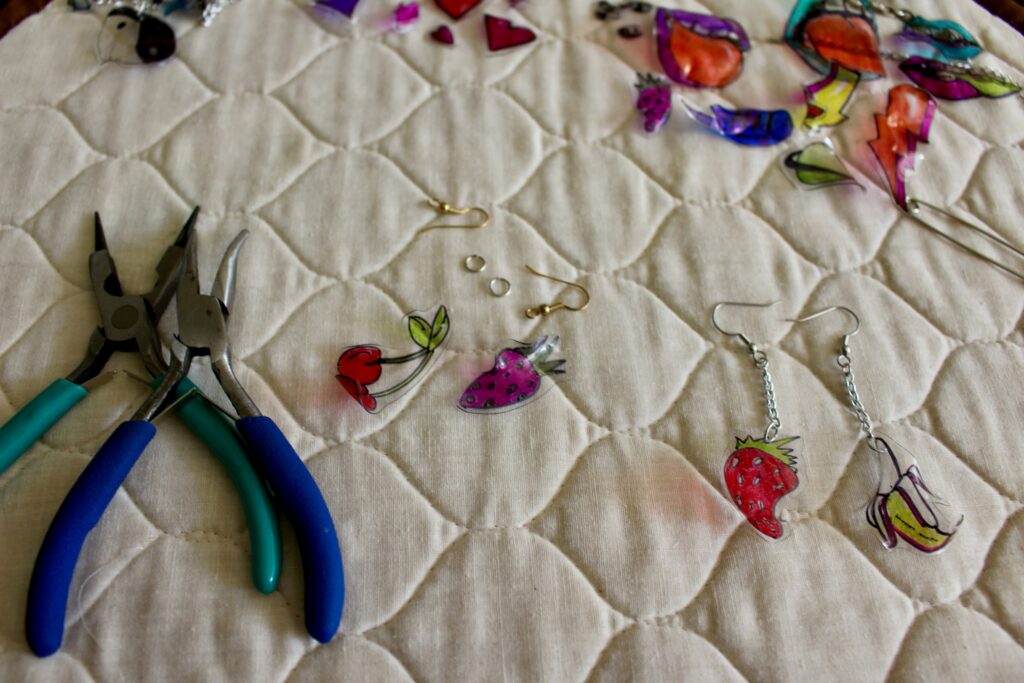
For the earrings, I used the same process as I did for the keychains, but instead of attaching the chain to a key chain ring, I attached the chain to an earring.


Now to make all of the rest of my shrinky dinks into other things!
What do you think? Will you make your own shrinky dinks? What designs will you draw? If you make your own shrinky dinks, we’d love to see them! Share with us on social, @goodwillakron or @_abigaildrennen!
Happy crafting!
_Abby