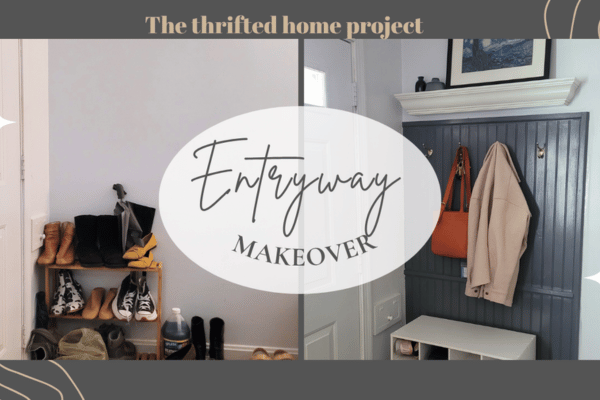
Welcome back to the thrifted home project. Last month, I shared my plans for my entryway makeover. I’m so happy to share how this makeover came together. I was able to thrift and save on this makeover. Having a mood board helped in sticking to my vision. First, I gathered my materials from a hardware store.
materials:
4 beadboard panels
2 long off-cuts of molding
Construction adhesive
Interior siliconized acrylic caulk in white
1 pack of drywall anchors with screws
4 polished brass hooks
Paint
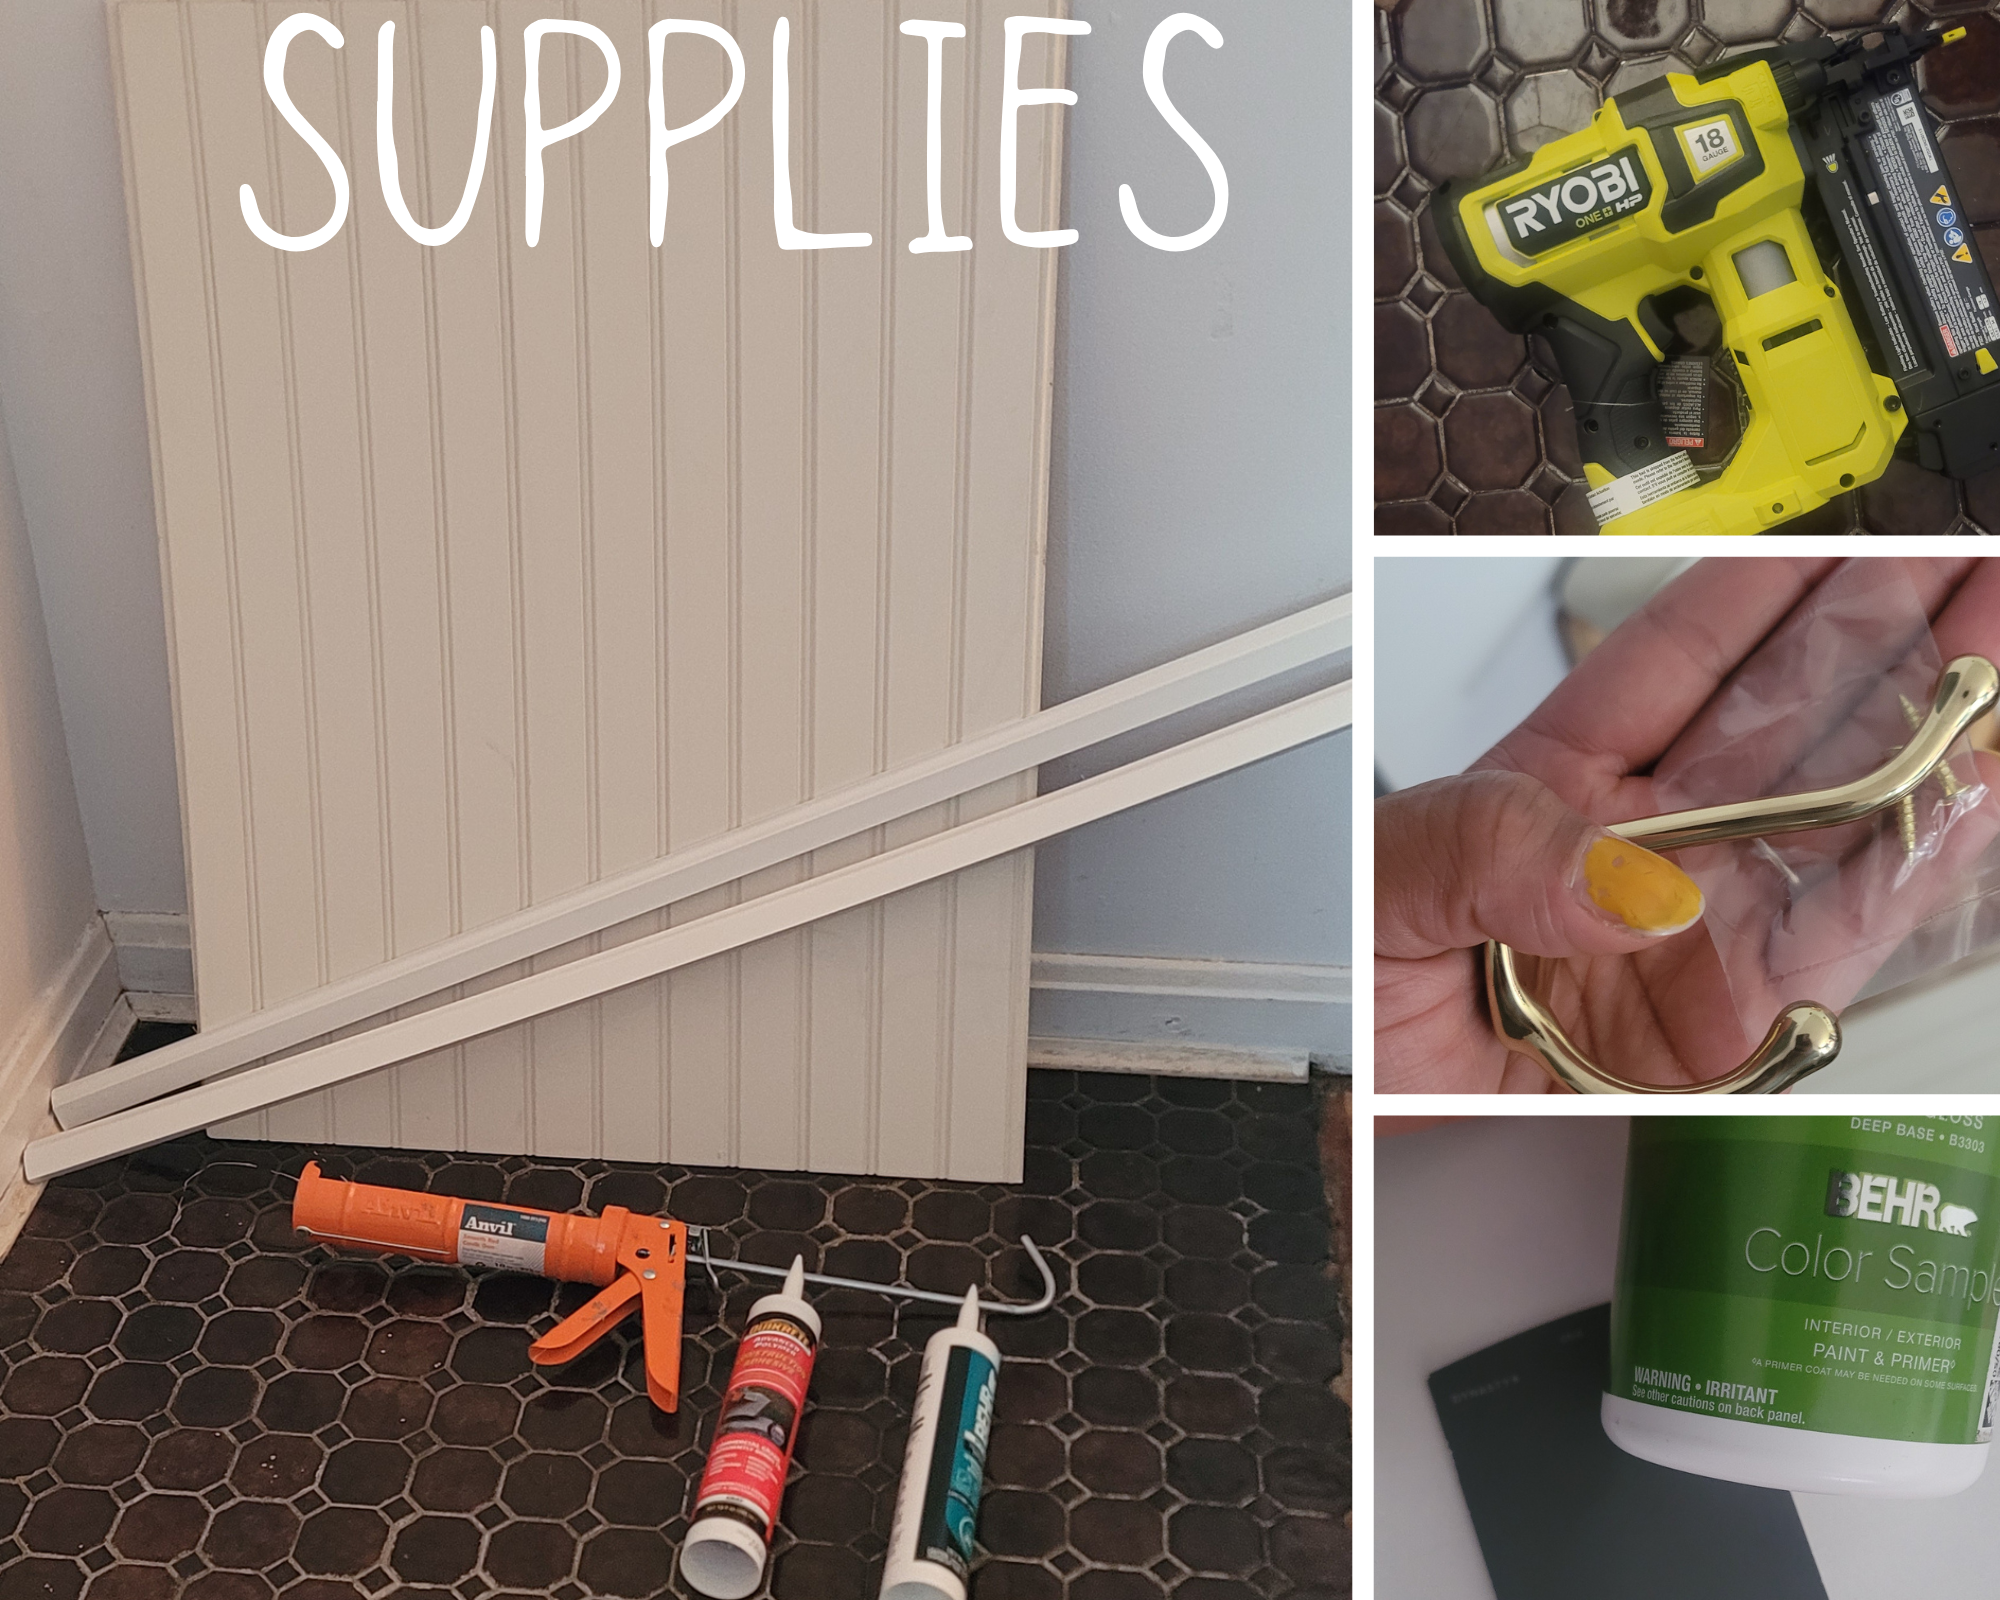
Tools used
Brad nail gun
Drill
Hand saw
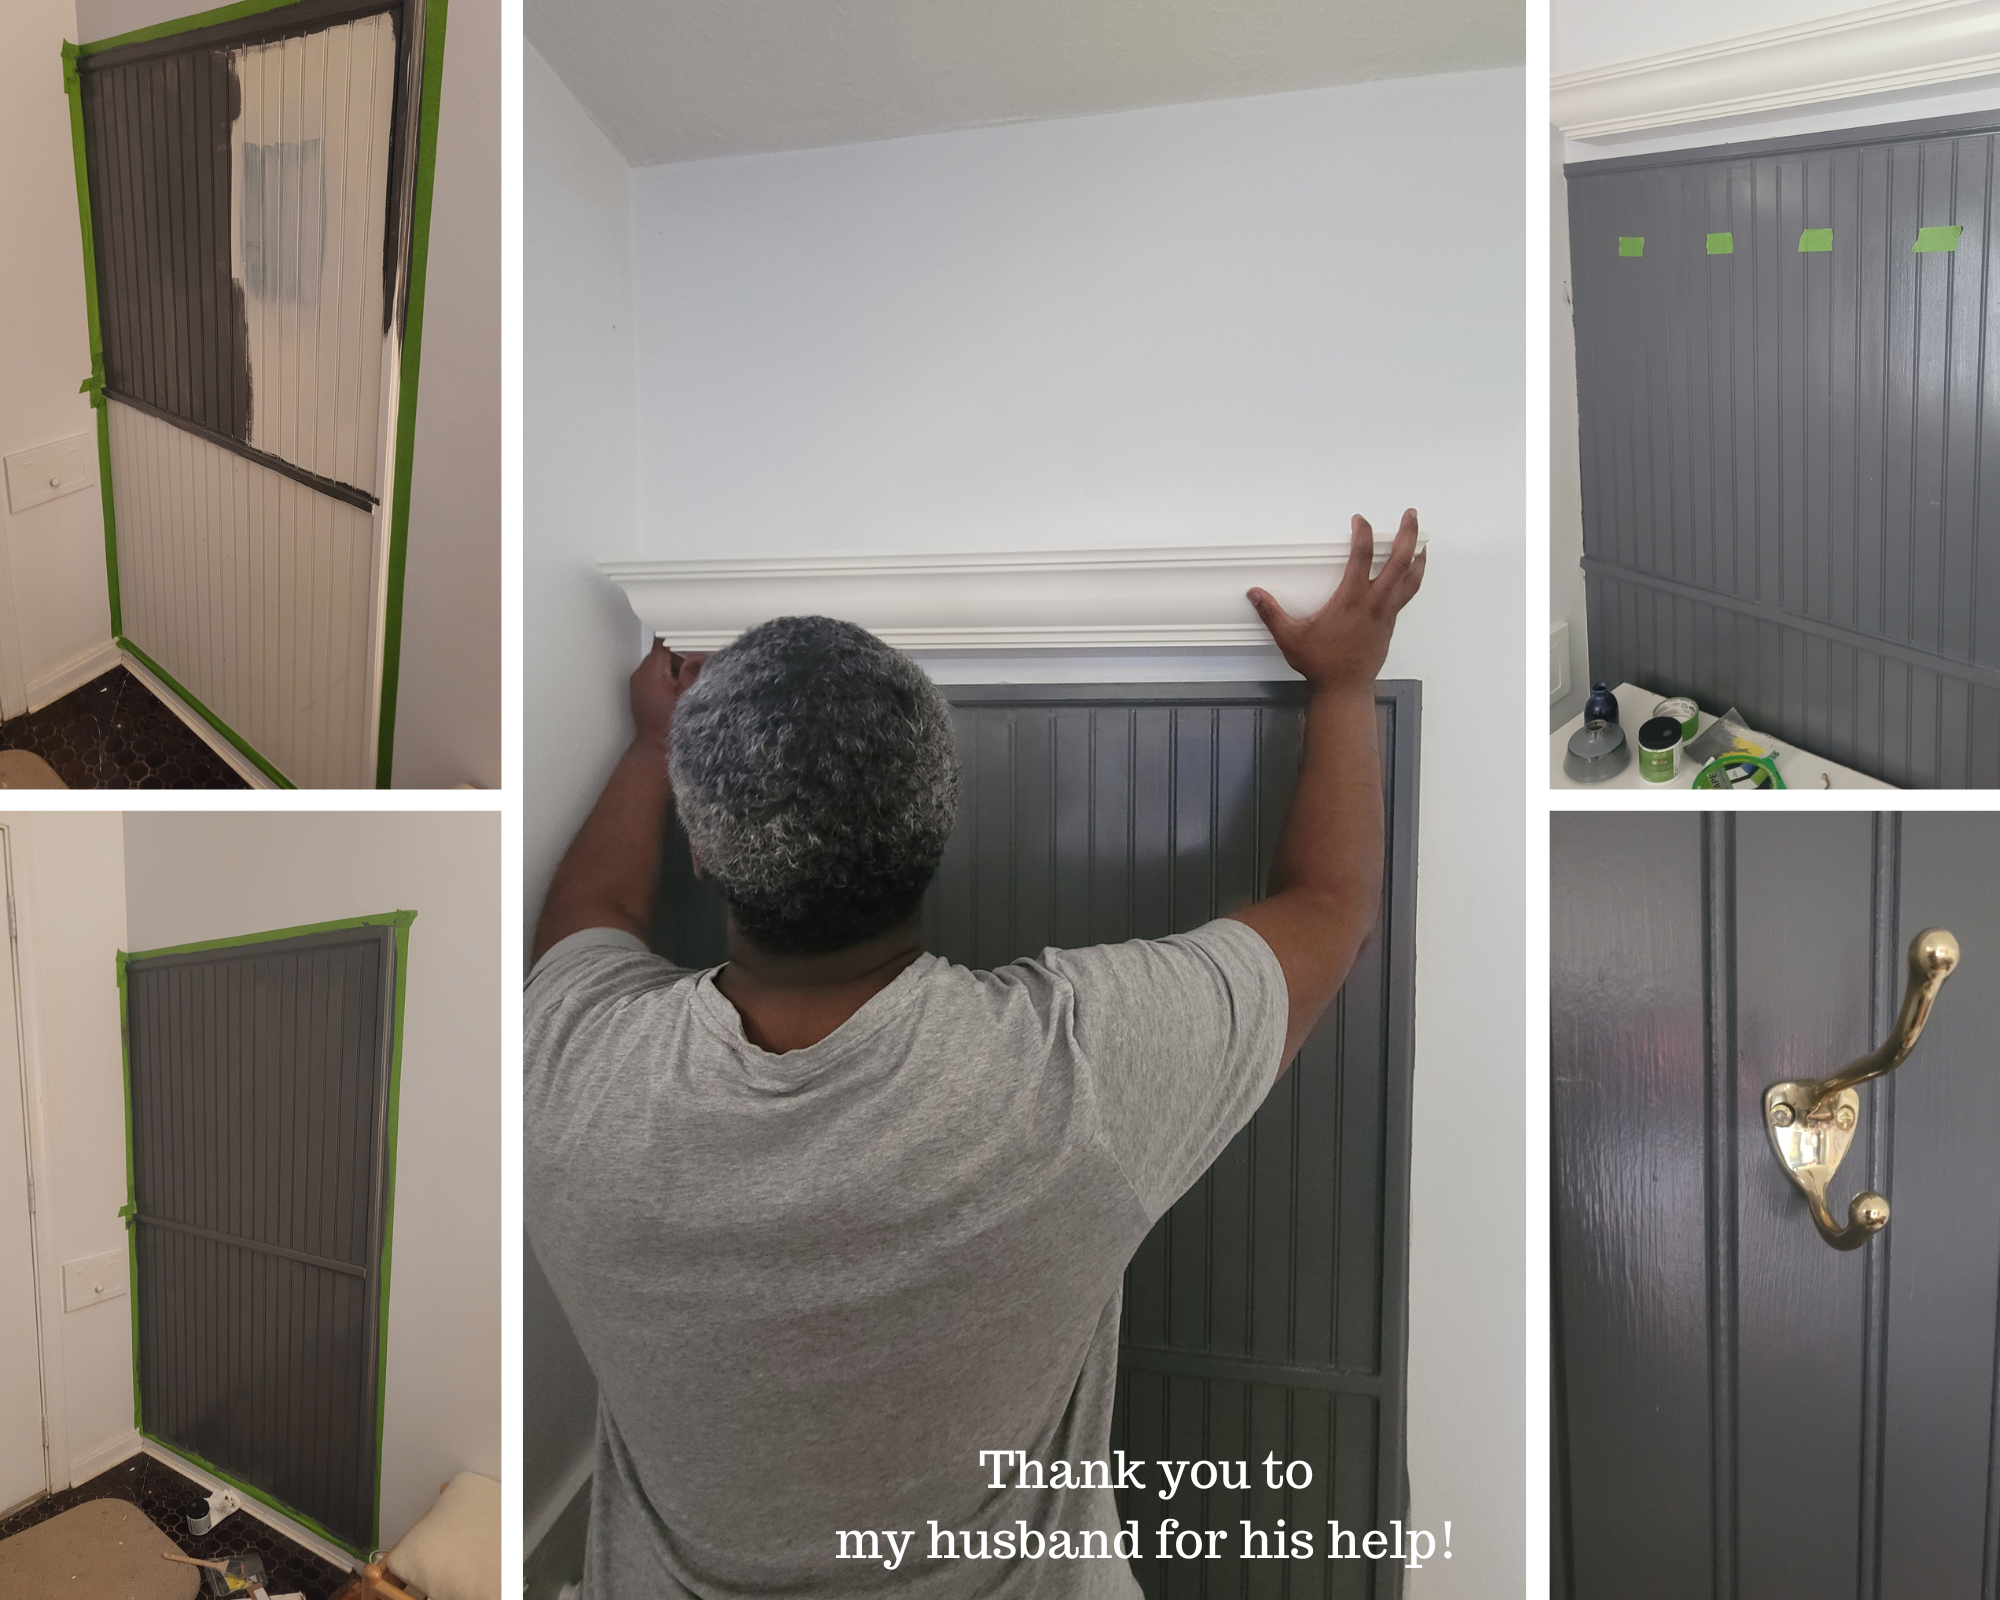
First, I cleared the area and gave the wall a thorough cleaning to remove any dirt or grime. Next, I installed the first panel with the construction adhesive and added some brad nails to hold it in place. It was my first time using a nail gun, and I must say it was a lot of fun! I measured the next panel and cut it down to size with a hand saw. The beadboard panels aren’t that thick, so it didn’t take too much effort. I repeated this on the other two panels. I place two panels on the bottom and place the other two top of the first two.
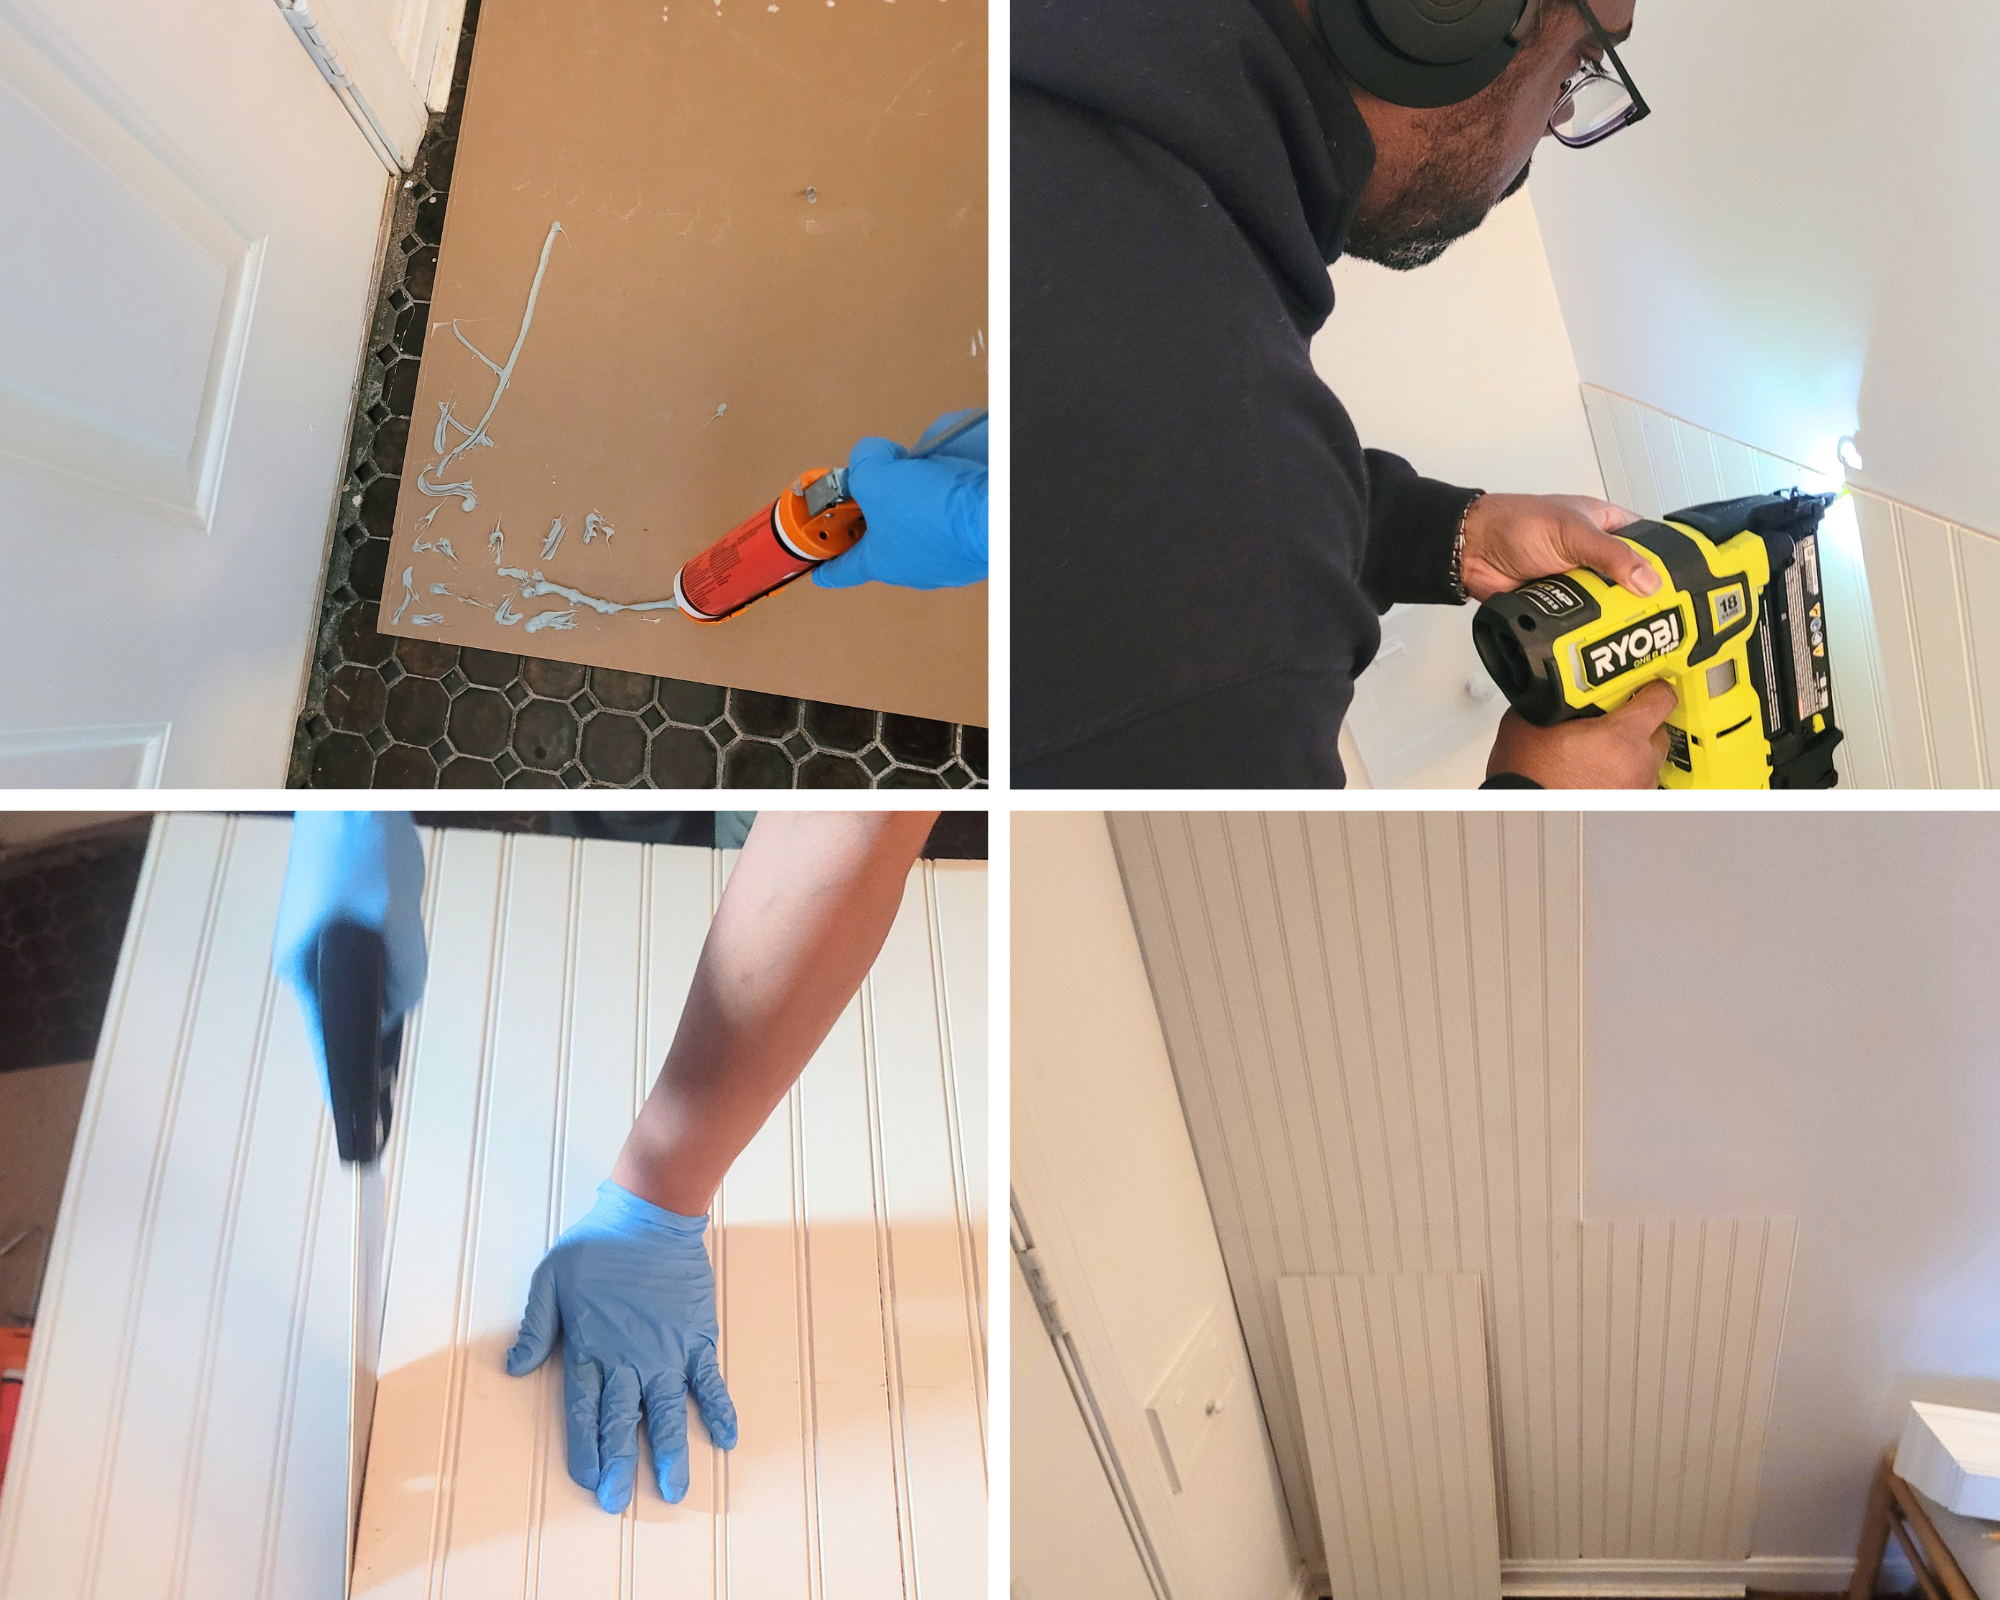
Next, I measured and cut the trim molding to size. I added molding to the top, side, and the center where the top and bottom panels meet. Again, using the construction adhesive and nailed it in place. I made everything seamless by caulking all the seams and nail holes.
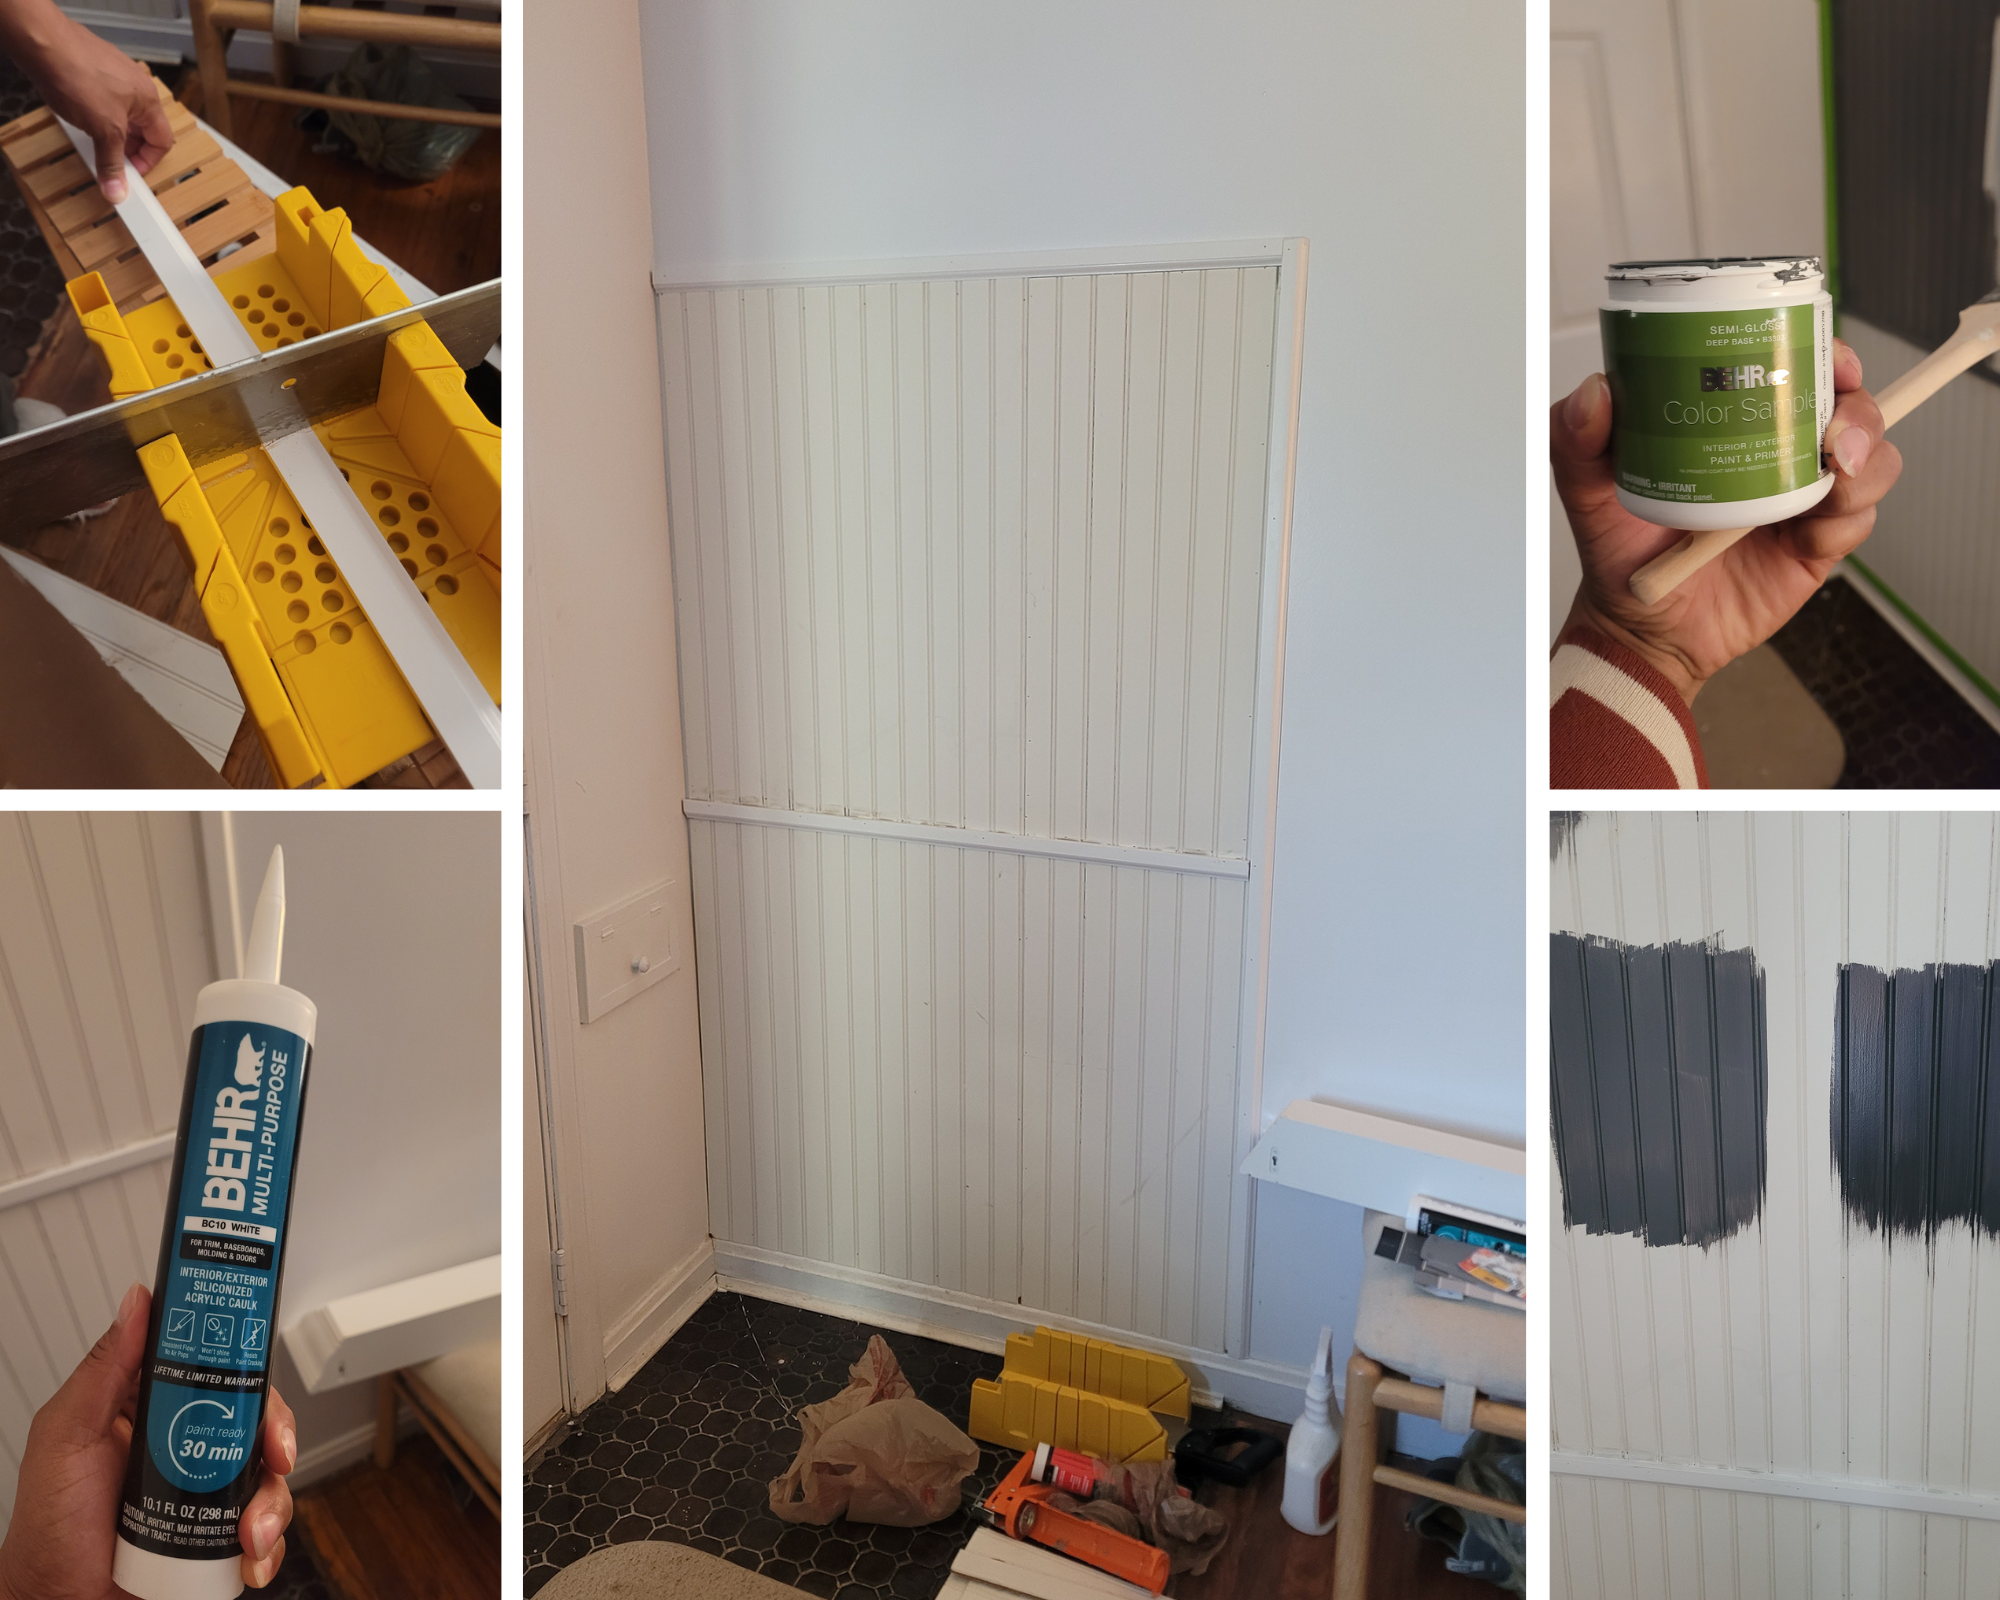
I decided on 2 paint swatches and got samples to test. I ended up going with Dark Ash from Behr Paints in a semi-gloss finish. Semi-gloss will help withstand the high traffic in this area. I painted 2 coats with just the $7 sample. This was a huge money saver and reduced any wasted paint. I already had painter’s tape and paint brushes from other projects.
My husband helped install the $10 white shelf I got from Goodwill Akron’s Streetsboro location. We secured part of it into a stud and used heavy-duty drywall anchors. I got these brass hooks from the hardware store and screwed them in place. My lovely sister-in-law gave me the shoe organizer she wasn’t using. I added the last few finishing touches with some thrifted decor on the shelf. This makeover is complete! A true transformation that combines function with style.
This first project may not be perfect, but it’s perfect for me. Hope this inspires you to tackle a space in your home.
Stay thrifty friends
~ Taylor S.